
Pruning
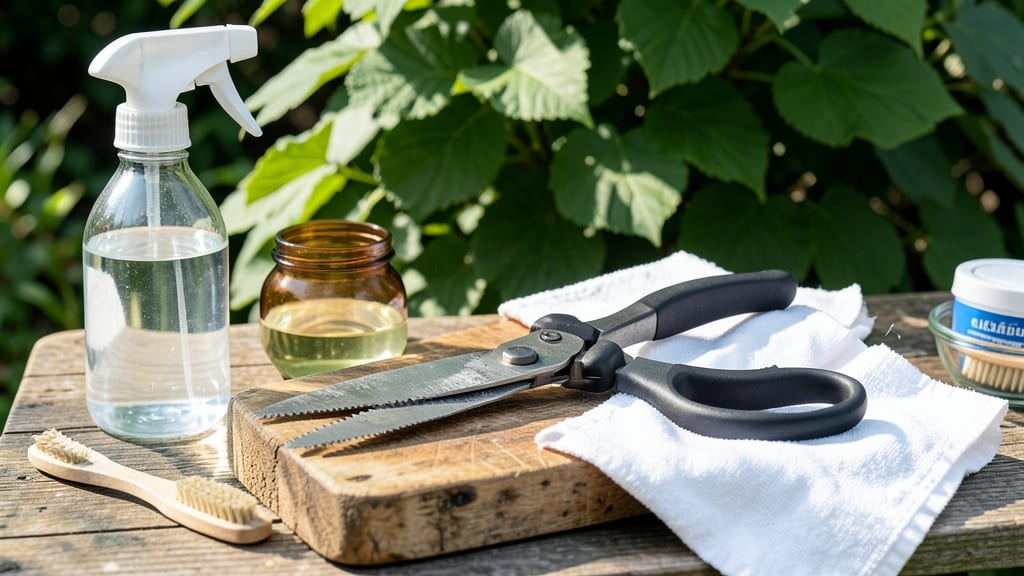
Disinfecting pruners isn't just cleaning—it's preventing your entire garden from turning into a disease buffet. 🌱 I learned the hard way when my carefully pruned roses developed black spot just days after trimming, thanks to contaminated tools spreading fungal spores.
The good news? A quick, bleach-free sterilization routine keeps your tools—and your plants—healthy.
You only need three things: rubbing alcohol (70% or higher), a clean cloth or paper towel, and about 5 minutes of your time. No fancy equipment, no harsh chemicals—just effective sanitation that works between every plant, especially when moving from diseased to healthy specimens.
This method kills 99.9% of bacteria and fungi without damaging your pruners.
After pruning, wipe the blades with alcohol-soaked cloths until they gleam, then let them air-dry completely. The alcohol evaporates quickly, leaving no residue, and your tools stay sharp while staying sterile. You’ll notice fewer wilting leaves, no mysterious spots appearing on foliage, and plants that bounce back stronger after cuts.
For extra peace of mind, store pruners in a dry place between uses—moisture is the enemy of clean tools. And here’s the kicker: this routine takes less time than watering a single pot, but it saves your garden from silent, creeping infections.
Your future self (and your plants) will thank you.
📚 In This Guide
- What you need
- Instructions
- Tips and common mistakes
- Wrapping up and next steps
What you need
- ● Pruners: Any type (bypass, anvil, or hedge)—just ensure they’re clean and free of sap or debris.
- ● Rubbing alcohol (isopropyl alcohol, 70% or higher): 1 bottle (8–16 oz)—for a quick, chemical-free wipe-down.
- ● Paper towels or clean microfiber cloths: 2–3 sheets/cloths—for drying and polishing.
- ○ Steam cleaner (optional but recommended): 1 unit—for deep sterilization (if available).
- ● Plastic bag or container: 1 small bag—to hold pruners while disinfecting.
- ● Food-grade hydrogen peroxide (3%): 1 small bottle—for an extra sanitizing boost.
- ● Pruner oil or light machine oil: 1 small bottle—to restore sharpness and prevent rust after cleaning.
- ● Gloves (nitrile or latex): 1 pair—to protect your hands from sap or residue.
- ● Toothbrush (small): 1 unit—for scrubbing tight spots or crevices.
Step-by-Step instructions for disinfecting pruners safely
Here's the quick, bleach-free method I use between every cut to keep my tools—and my plants—healthy.
💧 Step 1: Clean Off Debris and Sap
Start by wiping down your pruners with a damp cloth to remove any sap, dirt, or plant residue. Sap can dry and harden on the blades, making them less sharp and more difficult to disinfect. I like to use a slightly rough microfiber cloth—it catches debris better than paper towels.
Pay special attention to the pivot point where the two blades meet. This is where bacteria and fungi love to hide. If you see dried sap or gunk, don't scrub it off dry—just let the damp cloth loosen it for now. We'll tackle deeper cleaning in the next step.
🔥 Step 2: Heat Sterilize with a Flame or Boiling Water
For a fast, effective kill of bacteria and fungi, hold the pruners over a flame (like a gas stove burner) for about 10-15 seconds on each blade. The metal will heat up quickly, and you'll see any remaining debris burn away. I always do this outside or near a vent—it's a good way to clear out any lingering plant odors too.
If you don't have a flame, boiling water works just as well. Submerge the blades in a pot of boiling water for 30 seconds. The key is ensuring the entire blade gets hot enough to kill pathogens. You'll know it's working when steam rises consistently from the metal.
🧼 Step 3: Scrub with Soapy Water and a Brush
After sterilizing, let the blades cool slightly, then scrub them with warm, soapy water using a small brush (like a toothbrush or nail brush). This removes any remaining sap or grime that the heat didn't fully break down. Focus on the edges of the blades and the pivot area—these spots are prone to buildup.
I use a mild dish soap because it cuts through grease without leaving a residue that could dull the blades. Rinse thoroughly under running water to remove all soap. Any leftover soap can attract more dirt and reduce the effectiveness of future disinfections.
🌿 Step 4: Dry and Store Properly
Pat the pruners dry with a clean towel to prevent rust or water spots. Store them in a dry place, ideally hanging or in a tool holder where they won't come into contact with other tools. I keep mine in a small caddy with a few drops of mineral oil on a cloth—this keeps the blades lubricated and sharp for longer.
If you're done for the day, store them with the blades slightly open to allow air circulation. This prevents moisture buildup, which can lead to rust or mold. A quick wipe-down before storage makes all the difference in keeping them ready for next time.
⏰ Step 5: Disinfect Between Different Plants
This is where most gardeners slip up. Always disinfect your pruners between cutting different plants—especially if you're moving from diseased to healthy plants. Even a quick wipe-down with rubbing alcohol on a cloth can help in a pinch, but the heat method is far more thorough.
I keep a small bottle of 70% isopropyl alcohol in my gardening toolbox for emergencies. A quick spray and wipe between cuts keeps cross-contamination to a minimum. The goal is to break the cycle of spreading pathogens before they even start.
Tips & tricks for perfect pruner sterilization
Real talk: I've sanitized my pruners the wrong way more times than I care to admit—until I learned these game-changing tricks that actually work. Here's what nobody tells you about keeping your tools pathogen-free without bleach.
Heat Application Tip: For the flame method in Step 2, I've found that holding the pruners at a 45-degree angle helps heat penetrate the entire blade more evenly. Rotate them gently so all surfaces—especially the pivot area—get that critical 10-15 seconds of direct heat. The moment you see blue flames dancing along the metal, you know you've reached the right temperature to kill pathogens. This is where most people shortchange the process by only heating the edges.
Safety First: When using boiling water in Step 2, I always keep a towel handy to grab the pruners immediately after the 30-second soak. The metal stays dangerously hot for several minutes—long enough to give you a nasty burn if you're not careful. I've learned this the hard way after accidentally grabbing them with my bare hands. Pro tip: Use tongs if you're really worried about burns, especially when you're working near kids or pets.
Cleaning Precision: In Step 3, I've discovered that the pivot point needs special attention—this is where sap and moisture collect like a magnet. Use your brush to work the soap into this crevice, then hold the pruners under running water while gently opening and closing the blades. This flushes out hidden debris that would otherwise harbor bacteria. I've seen pruners that looked clean on the outside but had blackened gunk in the pivot—don't let that be yours.
Storage Hack: For Step 4, I store my pruners in a small caddy with the blades slightly open and a drop of mineral oil on a cloth inside. The oil prevents rust while the open position allows any residual moisture to evaporate. I've found that pruners stored this way stay sharp and ready for action for years. The key is doing this immediately after cleaning—don't let them sit damp overnight, even if they look dry.
Pro Tips for Disinfect Pruners
- Real talk: I've sanitized my pruners the wrong way more times than I care to admit—until I learned these game-changin...
- Heat Application Tip: For the flame method in Step 2, I've found that holding the pruners at a 45-degree angle helps ...
- Safety First: When using boiling water in Step 2, I always keep a towel handy to grab the pruners immediately after t...
Frequently asked questions
Got questions about keeping your pruners sharp, safe, and ready for action? Here are answers to the most common ones—no mystery left behind!
Do I really need to disinfect my pruners?
Disinfecting pruners prevents the spread of bacterial and fungal diseases between plants. If you’ve pruned a diseased branch, contaminated tools can infect healthy plants—even if they’re just a few feet away. Think of it like sanitizing scissors before a haircut!
How often should I disinfect my pruners?
Disinfect your pruners before and after each pruning session, especially if you’re working with multiple plants or trees. If you’ve pruned a sick plant, clean them immediately to avoid cross-contamination. For routine maintenance, a quick wipe-down between tasks keeps things in check.
Can I use alcohol or vinegar instead of bleach?
Yes! While 70% isopropyl alcohol or a 1:1 vinegar-water solution work well, bleach is the fastest option. Alcohol evaporates quickly, while vinegar leaves a residue that may require rinsing. For heavy-duty disinfection (like after pruning fire blight), bleach is still the gold standard—but always rinse thoroughly afterward.
What if my pruners rust after cleaning?
Rust is a sign your pruners need drying and oiling. After disinfecting, wipe them dry with a clean cloth, then apply a light coat of mineral oil or WD-40 to protect the metal. Store them in a dry place, and avoid leaving them in damp conditions (like a garage with high humidity). A little TLC keeps them rust-free for years!
Do I need different tools for diseased vs. healthy plants?
Ideally, yes! If possible, use separate pruners for diseased plants and healthy ones. If you must reuse tools, disinfect them thoroughly between uses—especially if the disease is highly contagious (like powdery mildew or canker). When in doubt, clean like it’s your last chance!
Wrapping up and next steps
Keeping your pruners clean isn’t just about sharp blades—it’s about healthy plants and long-lasting tools! With just a few simple steps, you’ve mastered a bleach-free, fast, and effective way to sterilize them in minutes.
Now, you’re ready to prune with confidence, knowing your tools are safe and sanitized every time. 🌿✨
Your next step? Grab those pruners and give your garden a little TLC! Whether you’re tackling overgrown shrubs or nurturing delicate flowers, your freshly disinfected tools will make all the difference. Happy pruning! 🌱💪