
Pruning
Pruning verbena isn't just about keeping it tidy—it's the secret to nonstop blooms all season long. ✂️ I used to deadhead verbena like everyone else, but after switching to strategic pruning, my plants now flower from early summer until frost.
The key is timing, technique, and knowing exactly where to cut for maximum regrowth.
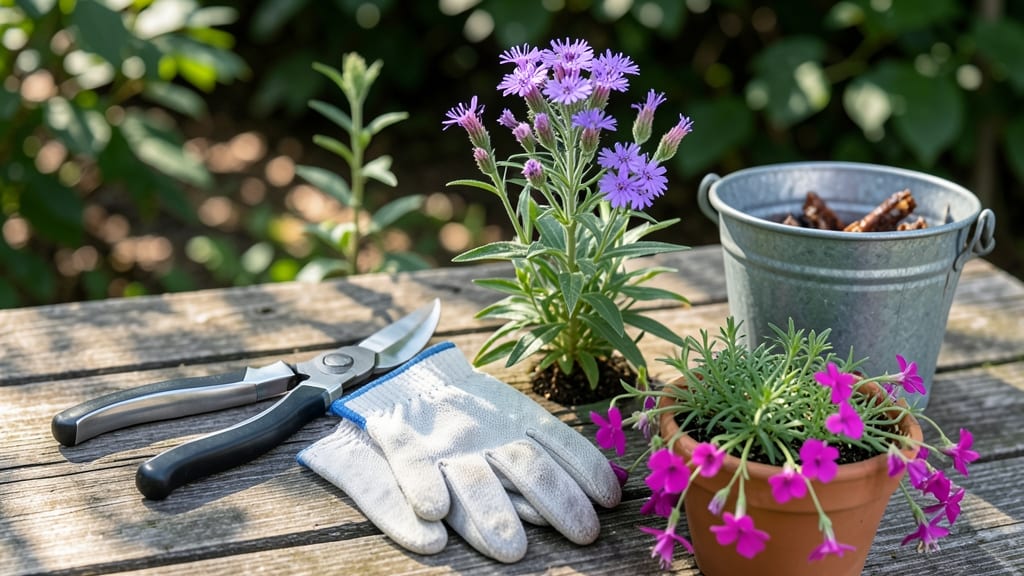
You'll need just a few simple tools: sharp bypass pruners for clean cuts, gloves to protect your hands from those tiny leaves, and a bucket to collect trimmings. The best time to prune is right after the first flush of blooms fades—this encourages a second, even more abundant wave.
For woody verbena varieties, a light pruning in early spring keeps them compact and flowering.
When you cut, aim for just above a set of healthy leaves or a bud, making the cut at a 45-degree angle to prevent water from pooling. This simple technique redirects the plant's energy into bushier growth and more flowers.
I've seen verbena that would've petered out by July now thriving with vibrant blooms well into October.
Watch for leggy growth or bare stems—these are your cues to prune. Just avoid cutting into old wood, as verbena won't regrow from there. With this method, you'll enjoy denser plants, longer blooming seasons, and fewer pests that love crowded, unpruned foliage.
Ready to transform your verbena from pretty to spectacular?
📚 In This Guide
- What you need
- Instructions
- Tips and common mistakes
- Wrapping up and next steps
What you need
- ● Bypass pruners – Sharp, clean pruners (e.g., Felco or Fiskars) to make precise cuts without crushing stems. Size: 5-7 inches
- ○ Hand pruners or garden shears – For smaller stems or delicate trimming. Optional but handy for detail work
- ● Disinfectant (rubbing alcohol or bleach solution) – 1 part bleach to 9 parts water to sterilize tools between cuts and prevent disease spread.
- ● Gloves – Heavy-duty gardening gloves (e.g., nitrile-coated) to protect against thorns and sap.
- ○ Garden twine or plant ties – To secure stems if you’re training verbena for a specific shape (e.g., topiary). Optional for structured pruning
- ● Pruning saw (if needed) – Only for thick, woody stems (rare in verbena but useful for older plants). Size: 8-10 inches
- ● Choose the right time – Prune in the early morning or late afternoon to avoid stressing the plant in peak sun.
- ● Weather check – Wait for a dry, calm day (no rain forecast for 24 hours) to prevent fungal infections.
- ● Water the plant beforehand – Lightly water verbena 1-2 hours before pruning to reduce stress on the plant.
- ● Have a cleanup plan – A bucket or bag for clippings (compost or discard based on plant health).
Step-by-Step instructions for pruning verbena
Here's how I keep my verbena blooming nonstop—just follow these simple cuts.
✂️ Step 1: Identify the Right Time to Prune
Prune verbena twice a year: once in early spring (right after new growth appears) and again in late summer (after the first flush of fall blooms). You'll know it's time when you see new 2-3 inch stems emerging in spring or when flowers start looking sparse in summer. Never prune when frost is forecasted—verbena is tender and won't recover.
I always wait until after the first hard frost has passed in spring because cold-damaged stems won't regrow properly. For summer pruning, aim for 6-8 weeks before your first fall frost—this gives the plant time to produce fresh growth before temperatures drop. Watch for buds forming at the stem bases—this is your signal to hold off pruning.
✂️ Step 2: Use Clean, Sharp Pruners for Precise Cuts
Grab your sterilized pruning shears (clean with rubbing alcohol between plants) and make cuts at a 45-degree angle, about ¼ inch above a leaf node or bud. This angled cut prevents water from pooling on the stem, which reduces rot risk. I like to work on dry, sunny mornings when stems are firm and less likely to tear.
Never cut into old, woody stems—verbena blooms on new growth, so focus on cutting back current season's growth to encourage bushier plants. If you see dead or brown stems, cut those back to healthy green growth immediately. For leggy stems, trim back to just above a set of leaves to promote branching.
✂️ Step 3: Shape for Airflow and Sunlight
Step back and look at your verbena—you want to create an open, rounded shape that lets sunlight reach the center. Cut back any stems that are crowding the center or growing inward, as this improves airflow and prevents fungal diseases. Aim to reduce the plant's height by about one-third during each pruning session.
For bushier growth, pinch off the top set of leaves on new stems—this encourages side shoots to form. I always leave at least 3-4 sets of leaves on each stem so the plant has energy to regrow. If you're growing verbena in containers, trim stems that are longer than the pot's height to maintain balance.
💧 Step 4: Water and Fertilize After Pruning
Give your verbena a deep watering right after pruning to help it recover. Water at the base of the plant (not overhead) to avoid wetting the leaves, which can lead to mildew. You'll notice new growth emerging within 7-10 days if conditions are right—this is your reward for pruning correctly.
Apply a balanced, water-soluble fertilizer (like 10-10-10) at half strength 2-3 days after pruning to support new growth. Avoid high-nitrogen fertilizers—they encourage leafy growth at the expense of flowers. If your verbena is in the ground, a light layer of compost around the base also helps without overwhelming the plant.
Tips & tricks for pruning verbena like a pro
These little tricks will help you keep your verbena thriving and blooming all season long.
Timing is Everything: The early spring and late summer pruning schedule is key—these are the only times verbena can handle the stress of cutting. In Step 1, when you see those 2-3 inch new stems in spring, that's your cue. For summer pruning, mark your calendar 6-8 weeks before your first fall frost—this gives the plant enough time to recover and produce new growth before cold weather sets in. I've learned the hard way that cutting too late in summer can leave your verbena vulnerable to frost damage.
The 45-Degree Angle Secret: In Step 2, when making those precise cuts, the 45-degree angle isn't just for looks—it's a water management trick. This angle prevents water from pooling on the cut stem, which dramatically reduces the risk of rot. I always make these cuts on dry, sunny mornings because the stems are firmer and less likely to tear. If you're working with damp stems, they'll be more fragile and harder to cut cleanly.
Visual Pruning Guide: For Step 3, imagine your verbena as a rounded dome when viewed from above. That's the shape you're aiming for—open in the center to let sunlight reach all parts of the plant. When you're cutting back stems that are crowding the center, think of it like thinning a haircut: you want to create space and airflow. The one-third height reduction guideline is perfect for maintaining that balanced shape without shocking the plant.
Post-Pruning Recovery: After you've done all that cutting, don't forget the recovery phase in Step 4. That deep watering at the base is crucial—it helps the plant absorb moisture through its roots rather than its leaves, which could lead to mildew. The 7-10 day window for new growth is your reward for doing everything right. If you don't see new shoots within that time, check your pruning cuts—you might have cut too close to the base or removed too much foliage at once.
Pro Tips for How Do You Prune Verbena
- These little tricks will help you keep your verbena thriving and blooming all season long.
- Timing is Everything: The early spring and late summer pruning schedule is key—these are the only times verbena can h...
- The 45-Degree Angle Secret: In Step 2, when making those precise cuts, the 45-degree angle isn't just for looks—it's ...
Frequently asked questions
Got questions about pruning verbena? You’re not alone—many gardeners want to keep their plants thriving without overcomplicating the process. Here are answers to the most common queries to help you prune like a pro!
When is the best time to prune verbena?
Prune verbena after it finishes blooming in early summer (for annuals) or in late winter/early spring (for perennials). This timing encourages fresh growth and more abundant flowers. Avoid pruning in fall—it can stunt new growth before winter dormancy.
How much should I cut back verbena?
For annual verbena, trim back by one-third to encourage bushier growth. Perennial types can be cut back harder—up to halfway—if they look leggy. Never remove more than ⅓ of the plant at once to avoid stressing it.
What if I prune at the wrong time?
Pruning too early (before blooms fade) or too late (after frost) can reduce flowering. If you’ve already missed the ideal window, focus on light trims to shape the plant. Verbena is forgiving—just avoid heavy cuts until the next growing season.
Can I prune verbena for indoor pots?
Yes! Container verbena benefits from the same pruning rules as outdoor plants. Pinch back leggy stems to promote branching, and trim spent blooms regularly. Just ensure pots have drainage—overwatering stressed plants can lead to root rot.
What do I do if my verbena looks woody or overgrown?
If your verbena has thick, woody stems, it’s likely past its prime. For annuals, replace it with fresh plants. For perennials, prune aggressively in early spring to rejuvenate growth. If the center is bare, cut back to healthy foliage to encourage new shoots.
Wrapping up and next steps
Pruning verbena is all about timing, technique, and consistency—and with these steps, you’ll keep your plants thriving and blooming like never before! 🌸 Whether you’re trimming for shape, encouraging new growth, or reviving leggy stems, a little effort goes a long way.
Now that you’re armed with the when, where, and how, grab those shears and get ready to enjoy a showstopping display of color all season long.
Ready for more? Next up: Try experimenting with deadheading spent blooms weekly to extend your verbena’s flowering season even further. Happy pruning! ✂️💚