
Pruning
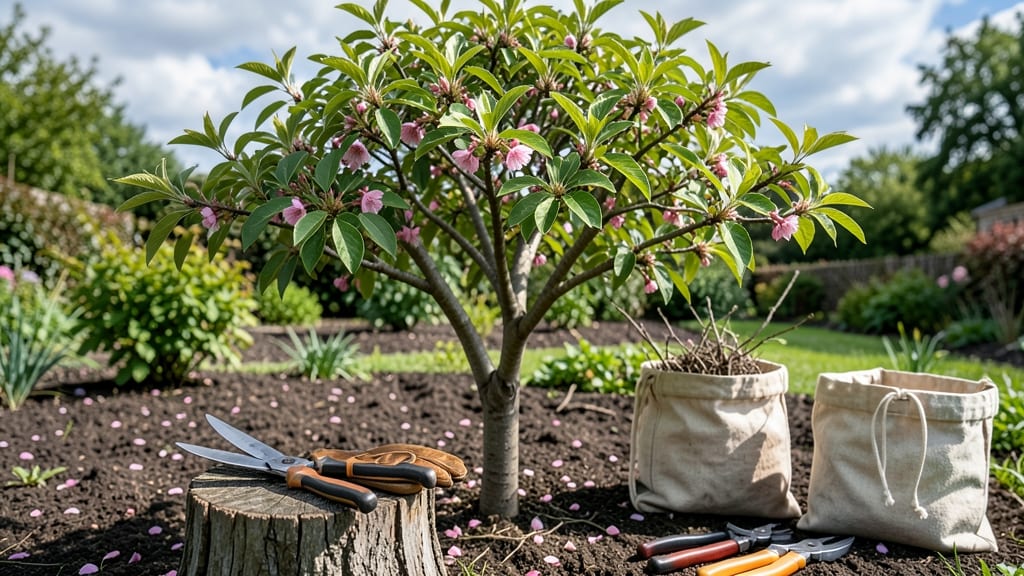
Pruning flowering cherry trees isn’t just about shaping—it’s about preserving those breathtaking spring blooms for years to come. 🌸 I’ve watched my own Prunus serrulata transform from a tangled mess into a showstopper after mastering the right cuts, and the difference is night and day.
The key? Timing, precision, and knowing which branches to keep (or sacrifice) for long-term health.
You’ll need sharp bypass pruners, a sturdy ladder, and a clear day—cloudy weather prevents sap bleeding and makes cleanup easier. Most pruning happens in late winter (just as buds swell) or early summer, but light maintenance year-round keeps the tree balanced.
The goal is to remove 10-20% of the canopy while maintaining an open center for airflow, which prevents fungal diseases that plague these delicate trees.
Start by cutting out dead, diseased, or crossing branches first—they’re the tree’s weak points. Then thin out crowded areas to let light reach the inner branches, where next year’s blossoms form.
Avoid heavy pruning in fall, as it invites pests and weakens the tree before winter. After pruning, water deeply to help the tree recover, and mulch lightly to retain moisture.
Common mistakes? Over-pruning (which stresses the tree) or pruning at the wrong time (like during active bloom). Flowering cherries bloom on old wood, so aggressive cuts now mean fewer flowers next spring.
If you’re unsure, start small—even a single branch removed correctly makes a difference. The payoff? A tree that bursts with color every spring, year after year.
📚 In This Guide
- What you need
- Instructions
- Tips and common mistakes
- Wrapping up and next steps
What you need
- ● Pruning shears: Bypass pruners (sharp, 6–8" blades) for small branches (¼"–¾" thick). Quantity: 1 pair.
- ● Loppers: Bypass or anvil type (8–12" blades) for medium branches (¾"–2" thick). Quantity: 1 pair.
- ● Pruning saw: Curved-tooth handsaw for thick branches (2"+ thick). Quantity: 1.
- ● Disinfectant: 70% isopropyl alcohol or bleach solution (1 part bleach:9 parts water) to sterilize tools between cuts. Quantity: Small spray bottle or wipe.
- ● Garden gloves: Cut-resistant, breathable (e.g., nitrile-coated). Quantity: 1 pair.
- ○ Extension pole: 3–6 ft telescoping pole with pruning saw attachment (for high branches). Optional: Yes.
- ● Safety glasses: To protect eyes from debris. Quantity: 1 pair.
- ● Heavy-duty trash bags: For collecting pruned branches. Quantity: 2–3.
- ● Rag or paper towels: For wiping tool blades clean. Quantity: 2–3.
- ○ Pruning sealant: Optional (e.g., tree wound dressing) for large cuts >1" in diameter. Quantity: Small tube.
- ● Weather: Choose a dry, overcast day (avoid wind or rain).
- ● Time of year: Late winter/early spring (dormant season): Ideal for major pruning.
- ● Summer (after blooming): Light pruning only.
- ● Tree health: Prune only if the tree is healthy and pest-free.
Step-by-step guide to pruning flowering cherry trees
Here’s how I keep my flowering cherries thriving with minimal stress and maximum bloom potential.
✂️ Step 1: Time Your Pruning for Optimal Bloom
Flowering cherries bloom on old wood, meaning last year’s growth produces this year’s flowers. Prune immediately after blooming (late spring) to avoid cutting off next season’s blossoms. If you must prune in summer, wait until after July—any cuts made now risk removing flower buds for next spring.
I always mark the timing on my calendar because these trees are sensitive. The key is to prune when flowers have faded but before new growth hardens—this gives the tree time to heal before dormancy. Never prune in fall or winter, as cold stress and frost damage make cuts heal poorly.
✂️ Step 2: Remove Dead, Diseased, or Crossing Branches First
Start by sterilizing your pruners with rubbing alcohol to prevent spreading disease. Scan the tree for dead branches (no leaves, brittle wood) or diseased wood (blackened spots, oozing sap). Cut these out first—never leave them, as they drain energy and harbor pests.
Next, look for crossing or rubbing branches—these create wounds where pathogens enter. Use sharp pruners to make clean cuts at the branch collar (the swollen area where the branch meets the trunk). Avoid leaving stubs, which invite decay. I like to step back and visualize the tree’s shape after these cuts before making any structural changes.
✂️ Step 3: Thin the Canopy for Airflow and Light
Flowering cherries need good airflow to prevent fungal diseases like powdery mildew. Thin the canopy by removing 10-20% of the smallest branches—focus on those growing inward or upward. These branches compete for sunlight and weaken the tree’s structure.
Make cuts just outside the branch collar, at a 45-degree angle if the branch is thicker than ½ inch. For thinner branches, a straight cut works fine. Step back frequently to check balance—you want an open, vase-like shape that lets light reach the center. Avoid heavy pruning; flowering cherries respond poorly to aggressive cuts.
✂️ Step 4: Shape for Balance and Future Growth
Now, refine the tree’s form by shortening only the longest branches—never cut back more than ⅓ of a branch’s length in one season. This maintains the tree’s natural silhouette while encouraging new growth. I prioritize branches that spoil the tree’s symmetry or grow too close to the ground.
Use hand pruners for branches under ½ inch and loppers for thicker stems. Seal larger cuts (over 1 inch) with pruning sealant to prevent disease entry, but skip it for small cuts—modern research shows it’s unnecessary for most trees. Finish by cleaning up fallen debris to reduce pest habitats.
⏰ Step 5: Post-Pruning Care for Recovery
Water the tree deeply after pruning to help it recover, especially if spring was dry. Apply a 2-3 inch layer of mulch (but keep it 6 inches away from the trunk) to retain moisture and regulate soil temperature. Avoid fertilizing immediately—pruning stresses the tree, and new growth needs time to establish.
Monitor the tree for new shoots at the base—these are often vigorous and can be pruned back in early summer to redirect energy upward. In fall, remove any sucker growth (shoots from the roots) to maintain the tree’s form. With proper timing and care, your flowering cherry will reward you with even more spectacular blooms next spring.
Tips & tricks for pruning flowering cherry trees
These key insights will help you avoid common mistakes and keep your flowering cherries healthy and blooming beautifully.
Timing is Everything: The window between when flowers fade and new growth hardens is narrow—usually just a few weeks in late spring. I check for flowers that have dropped petals but still have green buds remaining. This timing ensures you don't accidentally cut off next year's blossoms while still allowing the tree to heal before summer heat arrives.
Tool Preparation Matters: Always sterilize your pruners with rubbing alcohol between cuts, especially when dealing with diseased branches. I also sharpen my tools before starting—dull blades crush wood instead of making clean cuts, which creates larger wounds and invites infection. A quick wipe-down with a damp cloth after each cut prevents sap buildup that can dull blades mid-session.
Visualize the Canopy: Step back frequently to assess your progress. The goal is an open, vase-like shape that allows sunlight to reach the center. I imagine light streaming through the branches from above—this helps me identify which inward-growing branches need removal. Remember, flowering cherries respond poorly to heavy pruning, so focus on thinning rather than aggressive cutting.
Post-Pruning Care Prevents Stress: After finishing all cuts, water deeply and apply a 2-3 inch layer of mulch (keeping it 6 inches away from the trunk). This helps the tree recover by maintaining moisture and regulating soil temperature. I avoid fertilizing immediately because pruning stresses the tree, and new growth needs time to establish without competing for nutrients.
Pro Tips for Pruning Flowering Cherry
- These key insights will help you avoid common mistakes and keep your flowering cherries healthy and blooming beautifu...
- Timing is Everything: The window between when flowers fade and new growth hardens is narrow—usually just a few weeks ...
- Tool Preparation Matters: Always sterilize your pruners with rubbing alcohol between cuts, especially when dealing wi...
Frequently asked questions
Got questions about keeping your flowering cherry tree healthy and blooming beautifully? Here are some common concerns—and expert answers—to help you prune like a pro!
When is the best time to prune a flowering cherry tree?
The ideal time is right after the tree finishes blooming in late spring or early summer. Avoid pruning in fall or winter, as it can stimulate new growth that may not survive cold temperatures. Pro tip: If you must prune in winter, do so sparingly to minimize stress.
Can I prune a flowering cherry tree in the fall?
Pruning in fall is not recommended because it encourages tender new growth that can be damaged by frost. If you notice dead or diseased branches in fall, remove them immediately—but wait for spring to do any major shaping. Pro tip: Fall is a great time to plan your pruning strategy!
What if my flowering cherry tree isn’t blooming much?
Poor blooming can stem from over-pruning, nutrient deficiencies, or old age. Focus on light pruning to maintain shape, fertilize in early spring, and ensure it gets 6+ hours of sunlight daily. If the tree is mature, blooms may naturally decline—consider replacing it if needed.
How do I know if I’ve pruned too much?
Signs of over-pruning include leggy growth, sparse foliage, or weak blooms. If you’ve removed more than 25% of the canopy in one session, you’ve likely gone too far. Pro tip: Prune gradually over 2-3 years to avoid stressing the tree.
Can I prune a flowering cherry tree after a heavy snow or storm?
Yes, but only remove broken or damaged branches—never prune for shaping during or right after a storm. Wait until spring to assess the tree’s health and perform routine pruning. Pro tip: Use clean, sharp tools to make precise cuts and reduce disease risk.
Wrapping up and next steps
Pruning your flowering cherry tree might seem like a task, but with the right timing, tools, and techniques, you’ll reward yourself—and your neighbors—with stunning spring blooms year after year. 🌸 Remember, patience and consistency are key: focus on health over perfection, and your tree will thrive.
Now that you’re armed with knowledge, grab those pruners and give your cherry tree the care it deserves—start small, stay steady, and enjoy the beautiful results!
🌱 Ready to Prune?
Start with one session this winter or early spring, then build confidence with each cut. Before you know it, your flowering cherry will be the showstopper of your garden! 🌿