
Pruning
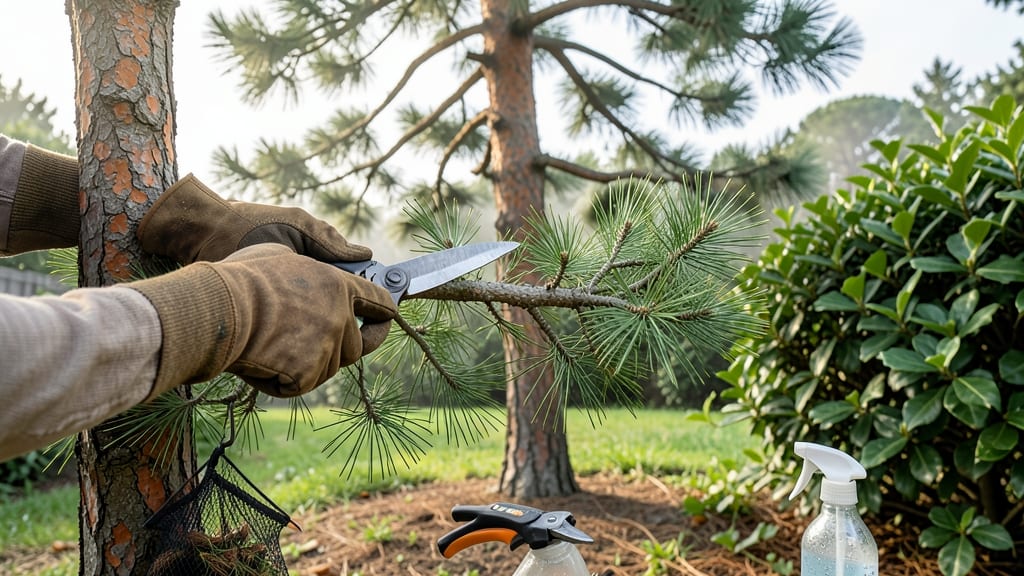
Late-winter pruning evergreen trees and shrubs unlocks their best growth for the year. ✂️ I’ve learned that the right cuts now mean thicker foliage, fewer pests, and plants that bounce back from drought—no matter how harsh your winter gets.
The key is timing, technique, and knowing which branches deserve attention (and which don’t).
You’ll need sharp bypass pruners, loppers for thicker branches, and a sturdy ladder if your evergreens are tall. Work on dry days when the plants aren’t stressed, and always disinfect your tools between cuts to prevent disease spread.
The goal isn’t to turn your shrubs into topiary—it’s to remove dead wood, thin crowded branches, and open up the center for airflow.
By spring, you’ll see new growth where you pruned, with fewer brown patches and stronger stems. Evergreens like junipers and arborvitae respond best to light shaping, while broadleaf evergreens (like rhododendrons) need rejuvenation cuts to refresh older wood.
The results? Plants that look fuller, stay healthier, and handle summer heat like champions.
This works for both backyard shrubs and large trees—just scale the tools and approach. Whether you’re tackling a single shrub or a whole hedge, the principles stay the same. Let’s get those branches trimmed the right way.
📚 In This Guide
- What you need
- Instructions
- Tips and common mistakes
- Wrapping up and next steps
What you need
- ● Pruning shears: Bypass pruners (for cuts up to ¾ inch) – look for sharp, stainless-steel blades.
- ● Loppers: For thicker branches (1–2 inches) – choose bypass or anvil types with long handles for leverage.
- ● Pruning saw: For branches 2+ inches in diameter – opt for a curved blade for precision.
- ● Extension pole: 6–10 feet long (with pruning shears/loppers attached) – saves time and strain for high branches.
- ● Work gloves: Heavy-duty, cut-resistant – protects hands from thorns and sharp edges.
- ● Safety glasses: ANSI-rated – shields eyes from debris.
- ● Disinfectant: 70% isopropyl alcohol or bleach solution (1 part bleach to 9 parts water) – prevents disease spread between cuts.
- ○ Pruning sealant: (Optional) – use only on large cuts (>½ inch) to prevent decay in some evergreens like pines.
- ● Tarp or drop cloth: – catches debris and protects landscaping.
- ● Marking twine or spray paint: – helps visualize pruning plans for complex shapes.
- ● Step ladder or sturdy stool: – for safe access to higher branches (ensure it’s rated for your weight).
- ● Weather: Prune on a dry, calm day (avoid frost or rain within 24 hours).
- ● Timing: Late winter (just before new growth starts) – ideal for most evergreens.
- ● Safety first: Check for power lines or hazards before starting.
- ● Tree health: Avoid pruning stressed or diseased plants unless necessary.
Step-by-step guide to pruning evergreen trees and shrubs
Late winter's the perfect time to refresh evergreens—here's how to do it right for healthier plants.
✂️ Step 1: Gather Tools and Assess the Plant
Start with clean, sharp pruning shears or loppers—dull blades tear tissue and invite disease. I always disinfect tools with rubbing alcohol between cuts to prevent spreading pathogens. For larger branches, use a pruning saw with a fine-tooth blade to avoid splintering the wood.
Examine the plant for dead, diseased, or crossing branches first. Dead branches snap easily when bent; diseased ones may have discolored needles or fungal growth. Mark these with surveyor's tape if you're working on a large specimen, so you don't miss any during the process.
🌿 Step 2: Remove Problematic Branches First
Begin by cutting out all dead, diseased, or damaged branches at their base. For diseased branches, bag and dispose of them immediately—never compost infected plant material. Cut at a 45-degree angle just outside the branch collar (the swollen area where the branch meets the trunk) to promote faster healing.
Next, remove crossing or rubbing branches that create wounds. These often develop into entry points for pests and diseases. When branches compete for space, the weaker one always loses—so prioritize the healthier branch if you're unsure which to remove.
☀️ Step 3: Thin Out the Canopy for Better Airflow
Evergreens need good airflow to prevent fungal issues. Step back and look for areas where branches grow too densely. Remove one-third of the oldest, innermost branches to open up the center. This encourages new growth on the outside and reduces shade stress on lower branches.
For shrubs, aim to create a natural, open shape rather than a tight ball. You'll know you've done enough when sunlight can reach the center of the plant. Avoid cutting more than 25% of the plant's total foliage in one season—this can stress the evergreen.
⏰ Step 4: Shape and Refine Growth
Now's the time to refine the plant's shape. For formal hedges, make cuts just outside the bud at a 45-degree angle to encourage outward growth. For natural shapes, follow the plant's natural growth patterns—never force an unnatural look.
Watch for "water sprouts" (fast-growing, upright shoots) and remove them at the base. These compete with the main structure for nutrients. If you're pruning a young evergreen, focus on removing only the worst offenders—heavy pruning now can stunt growth for years.
💧 Step 5: Clean Up and Monitor Recovery
After pruning, rake up all fallen needles and debris to reduce fungal spores in the area. Apply a balanced, slow-release fertilizer (like 10-10-10) around the base to support new growth. Water deeply but avoid soaking the cut areas—evergreens prefer slightly dry conditions after pruning.
In the weeks following, monitor the plant for signs of stress like yellowing needles or wilting. If you see new growth emerging from the cut areas, you've pruned correctly. For large evergreens, spread the pruning over 2-3 years to avoid shocking the plant.
Tips & tricks for pruning evergreen trees and shrubs
Late winter pruning can transform your evergreens—but only if you do it right. Here's how to avoid common mistakes and get the best results.
Tool Prep is Everything: I can't stress this enough—sterilize your tools between cuts, especially when moving from diseased to healthy branches. I've seen entire plants infected just because pruners carried pathogens. Use rubbing alcohol or a 10% bleach solution (rinse well) to clean blades. For larger cuts, a pruning saw with fine teeth prevents jagged edges that invite pests.
The 45-Degree Rule Matters: When making cuts, always aim for a clean 45-degree angle just outside the branch collar. This isn't just about looks—it promotes faster healing by allowing rainwater to run off rather than pool in the wound. I've seen too many cuts made straight across that never properly seal, leading to rot or infection over time.
Thinning vs. Topping: Evergreens hate being topped like old-fashioned hedges. Instead of shearing the top flat, focus on thinning from the inside out to create an open, airy structure. That one-third rule in Step 3 isn't arbitrary—it's the maximum safe removal to prevent stress. Think of it like giving your plant a spa day: you're removing the old, crowded growth to make room for new, healthy shoots.
Monitor Recovery Like a Pro: After pruning, keep an eye out for new growth emerging from cut areas—this is your plant's way of saying "thank you!" If you see yellowing needles or wilting within weeks, you might have overdone it. For large evergreens, consider spreading pruning over 2-3 years rather than doing everything at once. Patience here leads to stronger, more resilient plants long-term.
Pro Tips for Pruning Evergreen Trees And Shrubs
- Late winter pruning can transform your evergreens—but only if you do it right. Here's how to avoid common mistakes an...
- Tool Prep is Everything: I can't stress this enough—sterilize your tools between cuts, especially when moving from di...
- The 45-Degree Rule Matters: When making cuts, always aim for a clean 45-degree angle just outside the branch collar. ...
Frequently asked questions
Got questions about pruning evergreens? You’re not alone! Here are some of the most common concerns—and straightforward answers—to help you prune with confidence.
When is the absolute best time to prune evergreen trees and shrubs?
The ideal window is late winter to early spring (just before new growth starts), typically between February and March in most climates. This timing minimizes stress, reduces disease risk, and lets your plants recover before summer heat. Avoid pruning in fall—it can leave cuts vulnerable to winter dieback.
Do I really need to sterilize my pruners between cuts?
Yes!
Sterilizing pruners with rubbing alcohol or a 10% bleach solution between cuts prevents spreading fungal diseases (like Phytophthora) and bacterial infections. Evergreens are especially susceptible—don’t skip this step, even for small jobs. A quick wipe-down takes 30 seconds and saves hours of cleanup later.
What if I prune at the wrong time and my evergreen looks sad?
Don’t panic! Wrong timing rarely kills evergreens, but you might see temporary stress (yellowing needles, stunted growth). Focus on proper aftercare: water deeply, avoid fertilizing for 4–6 weeks, and monitor for pests. Most evergreens bounce back—just adjust your schedule next year!
Can I prune evergreens in rainy or windy weather?
Hold off if rain is forecasted for 24+ hours—wet cuts heal slower and invite disease. Windy days can also stress plants, making them more prone to sunscald (brown patches from exposure). Aim for calm, dry days with partial shade if possible. Early morning pruning works best for minimal stress.
What’s the difference between pruning junipers vs. azaleas?
Junipers (needle-bearing evergreens) thrive with light shaping—focus on removing dead branches and thinning for airflow. Azaleas (broadleaf evergreens) need more aggressive pruning to encourage blooms: cut back old wood by ⅓ after flowering, and avoid over-pruning new growth. Always use sharp tools for clean cuts!
Wrapping up and next steps
Pruning evergreen trees and shrubs in late winter isn’t just about shaping your landscape—it’s about giving your greenery a health boost for the seasons ahead. By removing dead wood, thinning dense growth, and encouraging airflow, you’re setting the stage for stronger, disease-resistant plants that’ll thrive all year. 🌿
Ready to roll up your sleeves? Start small—pick one plant at a time—and soon, you’ll see the difference in your yard’s vitality. Happy pruning!
Next step: Mark your calendar for late winter or early spring and grab your tools—your evergreens are waiting for a fresh start!