
How To
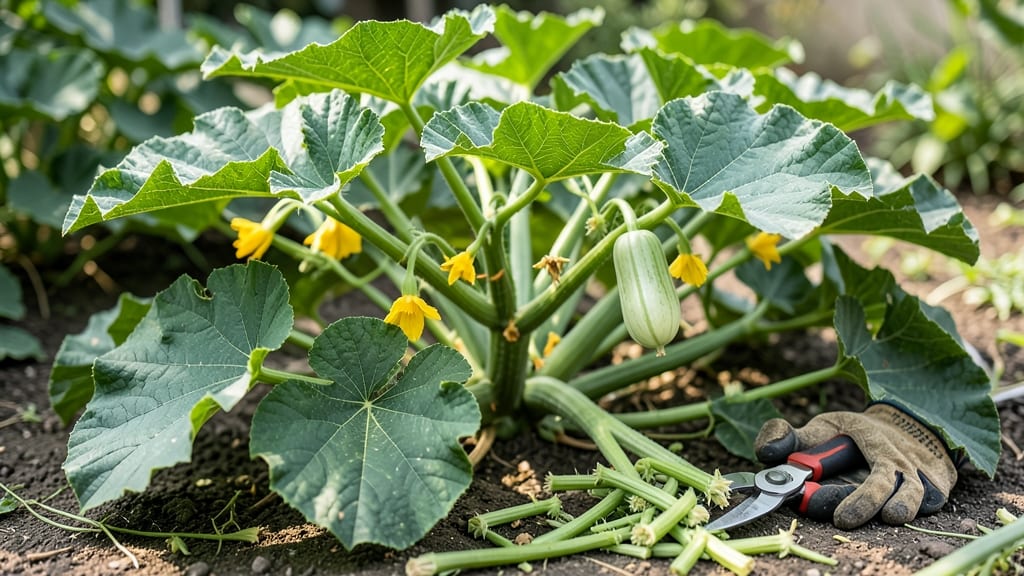
Pruning squash plants might sound intimidating, but three simple cuts can double your harvest. 🌱 Last summer, I went from a handful of squash to a bushel basket by focusing on just the right growth—no fancy techniques, just strategic snips.
The key is timing, tools, and knowing which parts to remove (and which to keep thriving).
You’ll need sharp pruners, a sunny morning, and about 15 minutes of focused work. Start by removing any yellowed or diseased leaves—this keeps energy flowing to the fruit. Then, trim back any vines growing toward the center of the plant (those "suckers" steal nutrients from your future harvest).
Finally, pinch off the first few male flowers to encourage stronger female blooms later. The result? More space for bigger, healthier squash.
📚 In This Guide
- What you need
- Instructions
- Tips and common mistakes
- Wrapping up and next steps
What you need
- ● Pruning shears or sharp scissors – Choose bypass pruners (clean cuts) or felco pruners (durable for thick stems). Avoid dull tools that crush stems.
- ○ Gloves (optional but recommended) – Heavy-duty gardening gloves to protect hands from thorns (especially on butternut or acorn squash) and dirt.
- ● Disinfectant (rubbing alcohol or bleach solution) – Clean tools between cuts to prevent disease spread (1 part bleach to 9 parts water).
- ● Garden twine or plant ties – If your squash vines are sprawling, tie them to stakes or trellises for better airflow and visibility.
- ● Compost bin or mulch – Collect pruned vines for compost or use mulch to protect soil and retain moisture.
- ● Hand pruners with a small blade – For delicate cuts on young plants or tight spaces.
- ● Magnifying glass – Helps spot early signs of pests or disease on leaves/stems.
- ● Spray bottle with water – Keeps plants hydrated post-pruning and reduces stress.
- ● Notebook & pen – Track pruning dates and plant responses for future reference.
Step-by-Step guide to pruning squash plants
Here's the simple method I use to boost yields and keep squash plants healthy—no fancy tools or guesswork.
✂️ Step 1: Remove Suckers for Stronger Vines
Squash plants produce unwanted side shoots called suckers that drain energy from fruit production. Check the main stem where leaves meet the vine—you'll see small shoots growing from the leaf axils. These are the suckers you want to remove. Use clean, sharp pruning shears to cut them off at the base, leaving no stubs.
I start pruning when the main vine reaches about 12 inches tall and continue every 5-7 days as new suckers appear. Focus on the first 4-5 main stems—these will produce the most fruit. If you see a sucker larger than 3 inches, it's already stealing energy from your harvest.
🌿 Step 2: Trim Excess Leaves for Better Airflow
Overcrowded foliage traps moisture and invites disease, especially powdery mildew. Look for leaves that are touching the soil or blocking sunlight from reaching the fruit. Remove these with your pruners, cutting cleanly at the stem base. I also trim any yellow or diseased leaves immediately—they spread problems fast.
Leave 6-8 healthy leaves per main vine to keep photosynthesis strong. You'll notice fruit near the base of the plant gets more sunlight after thinning leaves, which speeds up ripening. Avoid cutting more than 20% of the foliage at once—this can stress the plant.
✂️ Step 3: Prune Damaged or Overripe Vines
As the season progresses, you'll see vines with dead or dying sections, often from pests or disease. Cut these out completely, extending your cut to ½ inch below the damaged area. Also watch for vines with overripe or rotting squash—these can spread disease to healthy fruit. Remove the entire vine section back to a healthy leaf.
I prune these sections in the early morning when the plant is turgid (full of water). This reduces stress and helps the plant recover faster. After cutting, I always disinfect my shears with rubbing alcohol to prevent cross-contamination between plants.
🌱 Step 4: Maintain Pruned Plants Through Harvest
After your initial pruning, check plants weekly for new suckers or leaf issues. Keep the main vines supported with a small trellis or stakes if they're getting top-heavy. Water at the base early in the day to let foliage dry quickly—this prevents fungal growth in pruned areas.
You'll know your pruning is working when you see larger, healthier fruit developing along the main vines. Watch for vines with more than 3 squash—these need pruning to prevent overburdening. The key is consistency: a little maintenance now means bigger harvests later.
Tips & tricks for pruning squash plants
Here's what I've learned after years of gardening—these simple tips will help you prune like a pro.
Timing Secret: Early morning is the best time to prune because the plant's cells are full of water, making it less stressful. I always do my pruning between 7:00 and 9:00 AM when the dew has dried but the sun isn't yet intense. This gives your squash plants the whole day to recover before nightfall. The 5-7 day interval between prunings is key—don't wait longer or you'll lose the energy advantage.
Visual Cues for Pruning: When you're deciding which suckers to remove in Step 1, look for shoots that are growing at a sharp angle from the main vine. These are the ones to cut—straight, upward-growing suckers are often stronger and can sometimes be left if you're short on time. For leaves in Step 2, focus on removing those that are touching the soil or shading fruit. These leaves should be completely gone, not just trimmed back.
Tool Maintenance: Your pruning shears are just as important as your technique. After each use, wipe them clean with a damp cloth and rub them with mineral oil to prevent rust. I keep a small bottle of rubbing alcohol in my gardening bucket to disinfect shears between cuts, especially when moving from diseased plants to healthy ones. Sharp, clean tools make all the difference in how well your plants respond to pruning.
Seasonal Adjustments: In hot climates, you might need to prune more frequently—every 4-5 days instead of the standard 5-7 days. Watch your plants closely: if you see new suckers appearing faster than usual, it's time to adjust your schedule. During cooler weather, you can stretch the interval to 7-10 days as growth slows naturally. The key is to always remove suckers before they reach 3 inches—that's when they start competing seriously for your plant's energy.
Pro Tips for Prune Squash Plants
- Here's what I've learned after years of gardening—these simple tips will help you prune like a pro.
- Timing Secret: Early morning is the best time to prune because the plant's cells are full of water, making it less st...
- Visual Cues for Pruning: When you're deciding which suckers to remove in Step 1, look for shoots that are growing at ...
Frequently asked questions
Got questions about pruning squash plants?
You’re not alone! Here are answers to the most common concerns—from timing to tools—to help you grow like a pro.
When is the best time to prune squash plants?
Prune your squash plants in the morning when the vines are dry to reduce disease risk. Focus on early pruning (when vines are 12–18 inches long) to encourage bushier growth, and continue throughout the growing season to manage size and boost fruit production. Avoid pruning late in the day, as wounds take longer to heal.
What tools do I need for pruning squash?
You’ll only need a few basics: sharp pruning shears or clean scissors for small cuts, and a sterilized knife for larger stems. Disinfect tools with rubbing alcohol between plants to prevent the spread of bacterial or fungal diseases. No fancy tools? A clean, sharp pair of garden shears works just fine!
Will pruning squash plants increase my yield?
Pruning directs the plant’s energy toward fruit production instead of excessive vine growth. By removing suckers (side shoots) and overcrowded leaves, you improve airflow, reduce pests, and help larger fruits grow bigger and healthier. Think of it as giving your squash a growth hack!
What should I do if I see yellow leaves after pruning?
Yellow leaves can signal stress, but it’s often temporary. If only a few leaves yellow post-pruning, the plant is likely adjusting. However, if many leaves yellow or wilt, check for over-pruning or disease. Ensure your plant gets enough water, and avoid pruning more than 1/3 of the foliage at once. If the issue persists, test for pests or fungal issues.
Can I prune squash plants in containers or small gardens?
Yes! Container-grown squash benefits even more from pruning since space is limited. Focus on removing suckers near the base and thinning vines to prevent overcrowding. Use trellises or cages to guide growth upward, freeing up garden real estate for other plants. Just avoid heavy pruning—containers dry out faster, so prioritize airflow over aggressive trimming.
Wrapping up and next steps
Pruning your squash plants might seem intimidating at first, but with just three simple cuts, you’ll boost yield, improve airflow, and keep your garden thriving! 🌱 The key is timing—focus on removing runners, suckers, and overcrowded vines—and always use clean tools to prevent disease.
Now that you’re armed with these tips, there’s no reason to let your squash plants go wild.
Ready to harvest the rewards? Grab your pruners, step into your garden, and watch your squash flourish! For even more success, explore our guide on pest control for squash plants next—your future harvests will thank you. 🍉✨