
Pruning
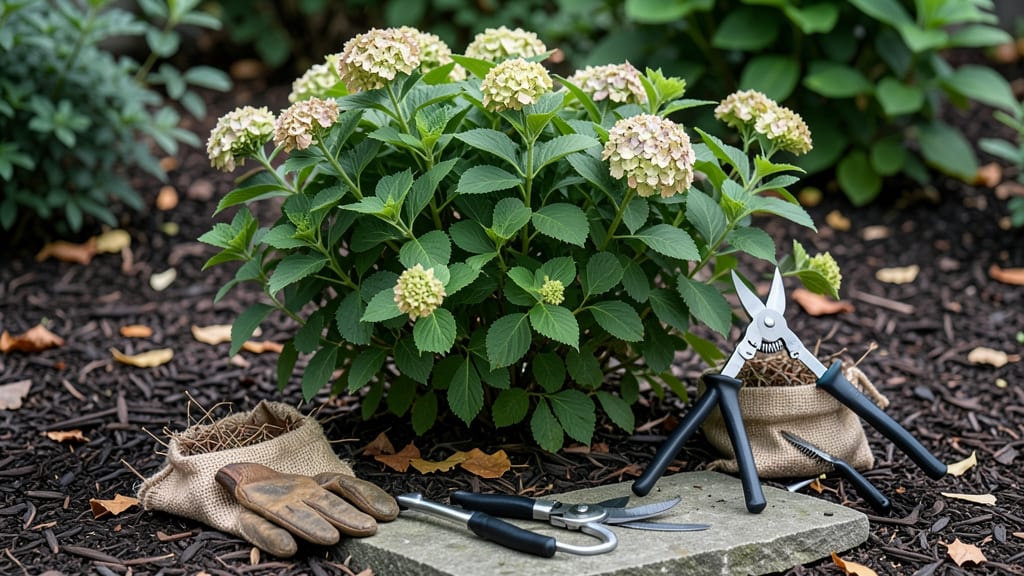
Pruning leaves isn’t just about shaping plants—it’s about giving them a second chance to thrive. ✂️ I’ve seen leggy, sad bushes transform into lush, vibrant plants after just one careful trim, and the secret lies in timing, technique, and knowing which leaves to keep (and which to say goodbye to).
Most plants benefit from a spring cleanup to remove winter damage, but some—like roses—need a late-winter prune to encourage early blooms. You’ll only need a few tools: sharp bypass pruners, gloves, and a bucket for clippings.
The key is working when the plant is dormant or just waking up, so you’re not disrupting new growth.
Start by removing dead, yellowed, or crossing branches first—they’re stealing energy from healthy leaves. Then, thin out crowded foliage to improve airflow, which cuts down on pests and diseases. Within weeks, you’ll notice fuller growth and more flowers, as the plant directs its energy where it matters most.
This method works for everything from roses and shrubs to fruit trees and even vegetables like tomatoes. The payoff? Plants that look better, grow stronger, and produce more. Let’s get those shears sharp and make some space for new life.
📚 In This Guide
- What you need
- Instructions
- Tips and common mistakes
- Wrapping up and next steps
What you need
- ● Pruning shears: Bypass pruners (sharp, clean blades) for clean cuts on small branches or leaves. Spec: 5–7 inches, stainless steel.
- ● Hand pruners: For thicker stems or woody plants. Spec: Heavy-duty, ergonomic grip.
- ● Gloves: Heavy-duty gardening gloves (cut-resistant) to protect hands from thorns or sharp edges.
- ● Disinfectant: Rubbing alcohol (70%+) or a horticultural spray to sterilize tools between cuts (prevents disease spread).
- ● Trash bag or bucket: For collecting pruned leaves/debris (1–2 large bags or a 5-gallon bucket).
- ● Ladder or step stool: If pruning tall plants (ensure it’s stable and rated for your weight).
- ● Loppers: For medium-sized branches (8–12 inches, bypass or anvil type).
- ● Pole saw: Extendable tool for high branches (10–15 ft reach).
- ● Plant tie/wire: To support branches post-pruning if needed.
- ● Label markers: If pruning named plants (e.g., for future reference).
- ● Safety glasses: Protects eyes from debris (especially when using power tools).
Step-by-step guide to pruning leaves for plant health
This is the method I use to keep plants thriving—just a few simple cuts make all the difference.
✂️ Step 1: Identify Leaves to Remove
Start by looking for yellow, brown, or wilted leaves—these are your first targets. Diseased or pest-infested leaves should go next, as they can spread problems to healthy foliage. I also remove any leaves that are crossing or rubbing against others, since this creates wounds where pathogens can enter.
For flowering plants, trim any spent blooms (those that have already dropped petals) to encourage new growth. You’ll know a bloom is spent when the center turns brown or the petals fall off naturally. This simple step keeps plants looking fresh and promotes more flowers.
✂️ Step 2: Use the Right Tools and Technique
Grab clean, sharp pruning shears—dull blades tear leaves instead of making clean cuts, which stresses the plant. Wipe the blades with rubbing alcohol before and after use to prevent spreading disease. For larger leaves or branches, use bypass pruners for precision.
Make cuts at a 45-degree angle, about ¼ inch above a leaf node or bud (the small bump where a leaf or branch grows). This angle helps water run off the cut instead of pooling, which reduces rot. Avoid cutting into woody stems unless necessary—focus on leaves and small growth first.
✂️ Step 3: Prune for Airflow and Light
Thin out crowded leaves to improve air circulation—this prevents fungal diseases like powdery mildew. Look for areas where leaves overlap or block sunlight from reaching the plant’s center. I like to start at the outer edges and work inward, removing every other leaf if needed to open up the plant.
For indoor plants, trim leaves that are growing toward a light source but aren’t reaching it. These leggy leaves waste energy. Instead, pinch or cut them back to encourage bushier growth. You’ll see new leaves emerge within 2-3 weeks as the plant redirects energy to stronger foliage.
✂️ Step 4: Clean Up and Monitor
After pruning, remove all trimmed leaves from the plant and garden area—don’t leave them on the soil or compost pile, as they can harbor pests or disease. Dispose of them in the trash or burn them if possible. Wipe down your tools again with alcohol to keep them sterile for next time.
Watch your plant for new growth in the next 1-2 weeks. If you see yellowing on remaining leaves, it might mean you over-pruned—just hold off on more cuts for a while. Healthy plants bounce back quickly, but even a little too much can stress them out.
⏰ Step 5: Schedule Seasonal Pruning
Spring is the best time to remove dead or damaged leaves from last year’s growth. In summer, focus on maintenance pruning—trimming as needed to shape the plant and encourage airflow. Fall is for light cleanup, removing any leaves that might harbor pests over winter.
I prune my plants every 4-6 weeks during the growing season, but adjust based on how fast they grow. Over time, you’ll notice fewer pests, better flowering, and a fuller, healthier plant. The key is consistency—just a little attention goes a long way.
Tips & tricks for seasonal leaf pruning
These little adjustments will transform your pruning routine from basic maintenance to plant care that actually makes a difference.
Tool Prep is Non-Negotiable: Before you even touch a leaf, sterilize your pruning shears with rubbing alcohol—this simple step prevents 90% of post-pruning infections. I keep a small bottle of alcohol right next to my gardening tools so I can wipe them down between cuts on different plants. Remember, diseased leaves can harbor pathogens that jump to healthy foliage if your tools aren't clean.
The Quarter-Inch Rule: When making cuts in Step 2, that ¼-inch measurement above the leaf node might seem small, but it's crucial. Cutting too close to the stem can expose the plant to rot, while cutting too far creates a larger wound. Practice on a few leaves first to get comfortable making clean cuts at this precise angle—your plants will thank you with stronger regrowth.
Seasonal Timing Matters More Than You Think: While the 4-6 week schedule works for most plants, spring pruning deserves special attention. In Step 5, when you're removing last year's dead growth, time it just as new shoots begin to appear—this gives your plant a head start on the growing season. For tropical plants, avoid heavy pruning during winter when growth naturally slows down.
Visual Cues Over Guessing: Instead of relying solely on time (like the 2-3 week window for new growth), watch for these visual signals: New leaves should appear slightly darker green than mature ones, and they'll often have a waxy sheen. If you see yellowing on remaining leaves after pruning, you may have removed too much—pause and let the plant recover before doing more.
Pro Tips for Prune Leaves
- These little adjustments will transform your pruning routine from basic maintenance to plant care that actually makes...
- Tool Prep is Non-Negotiable: Before you even touch a leaf, sterilize your pruning shears with rubbing alcohol—this si...
- The Quarter-Inch Rule: When making cuts in Step 2, that ¼-inch measurement above the leaf node might seem small, but ...
Frequently asked questions
Got questions about pruning leaves? You’re not alone! Here are answers to the most common concerns to help you trim like a pro.
When is the best time to prune leaves?
The ideal time depends on your plant, but late winter or early spring is best for most. This encourages new growth before summer heat. For flowering plants, prune after blooming to avoid cutting off next year’s flowers. Always avoid pruning during extreme weather or when your plant is stressed.
Can I prune leaves at any time of year?
While you can prune year-round, timing matters! Pruning in summer or fall may stimulate tender new growth that won’t survive winter. If you must prune outside the ideal window, do it gradually to minimize stress. Avoid heavy pruning in late fall—plants need energy to prepare for dormancy.
What if I accidentally prune too much?
Don’t panic! If you’ve over-pruned, your plant may look sad at first, but it can recover. Focus on watering deeply and fertilizing lightly to support regrowth. For woody plants, avoid pruning more than 25-30% of foliage in one session. If in doubt, prune less—you can always trim more later!
Are there alternatives to cutting leaves entirely?
Yes! If you dislike pruning, try thinning out instead—remove only the innermost or crowded leaves to improve airflow. For delicate plants, use leaf trimming scissors or even your fingers for precision. You can also pinch back new growth (gently squeezing stems to halt elongation) to encourage bushier growth without full pruning.
What if my plant gets yellow or brown leaves after pruning?
Yellow leaves often mean over-pruning or nutrient stress. Brown edges could signal underwatering or sunburn from sudden exposure. To fix it, reduce pruning, water consistently, and fertilize with a balanced plant food. If the issue persists, check for pests or disease—pruning can sometimes reveal hidden problems!
Wrapping up and next steps
Pruning leaves might seem like a small task, but it’s a powerful way to keep your plants thriving! By following seasonal best practices—removing dead foliage, shaping growth, and promoting airflow—you’ll give your garden a healthy boost. Start small, stay consistent, and watch your plants flourish!
Ready to take it further? Try experimenting with different pruning techniques—like topiary or deadheading—to elevate your green space even more. Happy trimming! 🌿✨