
Pruning
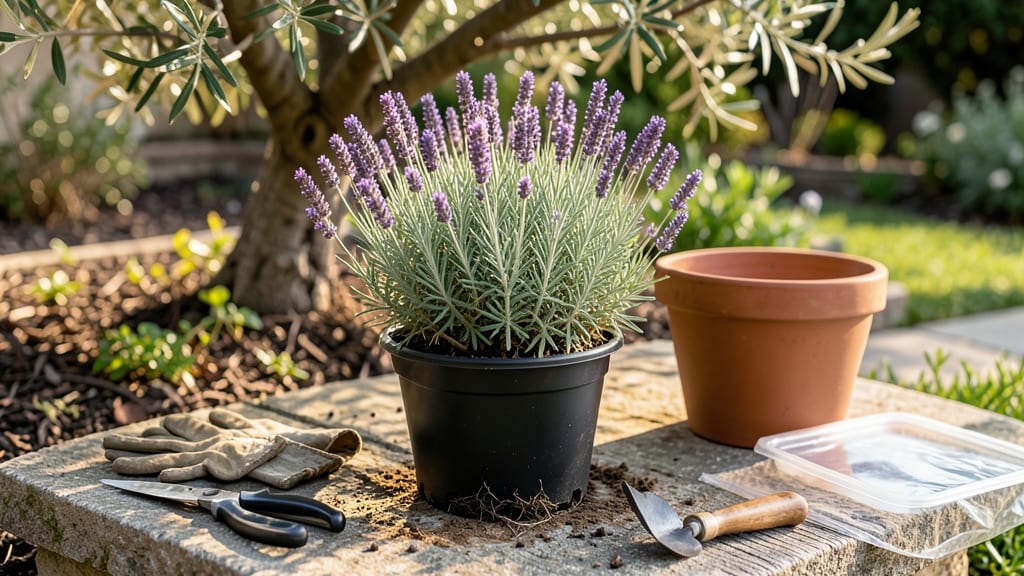
Root pruning pots isn’t about cutting roots—it’s about unlocking bigger, bushier plants by training them to spread. 🌿 When roots circle the pot or hit the edges, growth slows and leaves yellow.
I’ve used this technique to double the size of my basil and turn leggy parsley into dense, productive bushes in just 4-6 weeks.
The secret is timing and technique. Prune roots when you repot (every 6-12 months for fast growers) or if roots are visibly circling. Use clean, sharp shears to snip 1/3 of the root mass—never more—along the pot’s edges.
This shock forces new roots to grow outward, not in circles, and triggers a flush of new leaves.
You’ll notice the difference within 2-3 weeks: stems thicken, leaves darken, and plants fill their pots faster. For herbs like thyme or oregano, this keeps them compact and flavorful.
For veggies like peppers, it means more fruit per plant. The key? Don’t overdo it—roots are the plant’s lifeline, and too much pruning stresses them.
Works for almost any container plant, from succulents to tomatoes. Just adjust the frequency: fast growers (like lettuce) need pruning every repotting, while slow growers (like rosemary) can wait. Here’s how to do it without killing your plants—guaranteed.
📚 In This Guide
- What you need
- Instructions
- Tips and common mistakes
- Wrapping up and next steps
What you need
- ● Root pruning pots – Choose pots with removable bottoms or built-in root pruning grids (e.g., 5–10" diameter for small plants, 12–18" for larger ones). Must have drainage holes!
- ● Potting mix – High-quality, well-draining blend (e.g., 50% peat moss, 30% perlite, 20% compost). Aim for 2–3 gallons per pot.
- ● Your current plant – Select a healthy container-grown plant with visible root congestion (roots circling or poking out of drainage holes).
- ● Pruning shears or sharp knife – Sterilized to prevent disease (rubbing alcohol wipe works!).
- ● Gloves – Garden-grade to protect hands from soil and sharp roots.
- ● Watering can or hose with gentle spray – For post-pruning hydration.
- ○ Root stimulator – Optional but helpful (e.g., mycorrhizal fungi or seaweed extract to speed recovery).
- ○ Hydrogen peroxide (3%) – Optional for cleaning tools or disinfecting pruned roots.
- ○ Plant support (stakes or cages) – Optional if your plant needs extra stability post-pruning.
- ○ New larger pot – Optional for transplanting after root pruning (size up by 2–4 inches).
- ○ Camera or sketchbook – Optional but fun! Document your plant’s root system before/after for progress tracking.
How to use root pruning pots for bushier container plants
Here's how I transform leggy, top-heavy container plants into full, rounded bushes—no complicated tools needed.
🪴 Step 1: Select the Right Root Pruning Pots
Choose pots with built-in root pruning rings (usually at the bottom third of the pot). These rings create a physical barrier that forces roots to grow outward instead of spiraling downward. I prefer fabric pots with root pruning zones because they also allow excess moisture to evaporate through the walls, preventing soggy roots.
Make sure the pot size matches your plant's mature needs. A 12-inch pot works well for most shrubs like boxwoods or dwarf lilacs, while 18-inch pots handle larger specimens like hydrangeas. The root pruning rings should sit about 3-4 inches from the bottom—this gives roots enough space to establish before hitting the barrier.
🌱 Step 2: Plant and Position for Optimal Growth
Fill the pot with well-draining potting mix up to just below the root pruning ring. Gently remove your plant from its nursery container and loosen the root ball if it's tightly bound. Place it in the pot so the top of the root ball sits 1-2 inches below the pot's rim—this allows room for mulch and prevents water from spilling over when you water.
Press the soil lightly around the roots to eliminate air pockets, but don't compact it. Water thoroughly until it drains from the bottom holes. Here's the thing—don't fertilize right away. Wait 4-6 weeks to let the roots adjust to their new space before adding nutrients. This gives them time to spread into the root zone without competing for resources.
☀️ Step 3: Monitor and Encourage Canopy Growth
Place your potted plant where it gets at least 6 hours of sunlight daily. Root pruning pots work best when combined with regular pruning above ground to balance the plant's energy. Pinch back leggy stems by one-third when you notice new growth in spring, and repeat every 4-6 weeks during the growing season.
You'll see the difference within 8-12 weeks: instead of long, sparse stems reaching for light, your plant will develop a fuller, bushier shape as roots hit the pruning ring and redirect energy outward. Watch for new side shoots forming at leaf nodes—this is your signal that the pruning is working. If you notice yellowing leaves, it's usually a sign of overwatering, so let the top 1 inch of soil dry out between waterings.
✂️ Step 4: Maintain and Refresh as Needed
Every spring, check the root pruning ring for roots growing against it. If you see a thick mat of roots pressing against the barrier, it's time to refresh the plant. Carefully remove the top layer of soil (about 2 inches) and trim any roots that have circled the ring. This prevents girdling and keeps the plant healthy.
Replace the removed soil with fresh potting mix and add a slow-release fertilizer to support new growth. I like to top-dress with 1-2 inches of organic mulch to retain moisture and regulate soil temperature. This step is crucial—skipping it can lead to root-bound plants that struggle to absorb nutrients, even with pruning rings in place.
Tips & tricks for perfect root pruning pots
Here's what nobody tells you about getting the most out of your root pruning pots—these tricks make all the difference.
Pot Selection Insight: Fabric pots with root pruning zones are my go-to because they breathe. The breathable walls prevent soggy roots while the rings force outward growth. If you're using traditional plastic pots, look for ones with built-in drainage holes AND the pruning rings—this combo prevents both waterlogging and root spiraling.
Planting Technique: In Step 2, when you're positioning your plant, make sure the root ball sits just right—1-2 inches below the rim. This isn't just about aesthetics; it creates that perfect zone for mulch while preventing water from pooling against the pruning ring. I've seen roots actually grow UPWARD when planted too deep, which defeats the whole purpose!
Timing Secret: The 4-6 week wait before fertilizing might feel long, but trust me on this. This break lets roots establish in their new space without competing with nutrients. I've seen plants that got fertilized too soon develop weak, sparse growth—like they were still searching for their footing.
Maintenance Strategy: During your spring refresh (Step 4), don't just trim the roots you see at the ring. Use your fingers to gently probe the soil around the ring—you'll often find roots growing in circles that need trimming. This prevents girdling, which can strangle your plant's growth completely.
Pro Tips for Root Pruning Pots
- Here's what nobody tells you about getting the most out of your root pruning pots—these tricks make all the difference.
- Pot Selection Insight: Fabric pots with root pruning zones are my go-to because they breathe. The breathable walls pr...
- Planting Technique: In Step 2, when you're positioning your plant, make sure the root ball sits just right—1-2 inches...
Frequently asked questions
When is the best time to root prune container-grown plants?
Root pruning works best during the active growing season—spring or early summer. Avoid pruning roots in winter (dormancy) or late summer (heat stress). For annuals, root prune when repotting; for perennials, do it every 2–3 years to encourage new growth.
How much of the roots should I trim when root pruning?
Trim 1/3 to 1/2 of the root ball if repotting, focusing on circular roots (girdling roots) and overcrowded roots. Use clean, sharp shears to avoid crushing roots. If roots are tightly packed, gently loosen them before replanting to stimulate outward growth.
Can I reuse the same pot after root pruning?
Not ideal! Root pruning is best paired with upgrading pot size (1–2 inches larger diameter). If reusing the same pot, sterilize it and refresh the soil to prevent disease. Smaller pots may stress the plant, slowing recovery. Aim for better drainage and aeration in the new container.
What if my plant looks stressed after root pruning?
Post-pruning stress is normal—expect wilting or yellowing for 1–2 weeks. Keep the plant in bright, indirect light and water lightly but consistently. Avoid fertilizing for 4–6 weeks to let roots recover. Most plants bounce back within 3–4 weeks with proper care!
Are there alternatives to root pruning for container plants?
Yes! Try these low-stress alternatives:
- Top-dressing: Add 1–2 inches of fresh soil to the surface to encourage shallow root growth.
- Soil aeration: Gently fork the soil to break up compacted roots without cutting.
- Frequent repotting: Rotate plants to larger pots annually to prevent root binding.
Wrapping up and next steps
Root pruning pots are a game-changer for container gardening, helping you cultivate healthier, fuller plants while keeping them manageable. By encouraging strategic root growth, you’ll unlock bigger blooms, stronger stems, and longer-lasting plants—all without sacrificing your space.
Whether you’re a seasoned gardener or just starting, this technique is simple, cost-effective, and highly rewarding!
Ready to transform your container garden? Grab your tools, pick a plant, and give root pruning a try today! 🌱✨ For even more tips, check out our guide on mastering pruning techniques to keep your green thumbs growing!