
Pruning
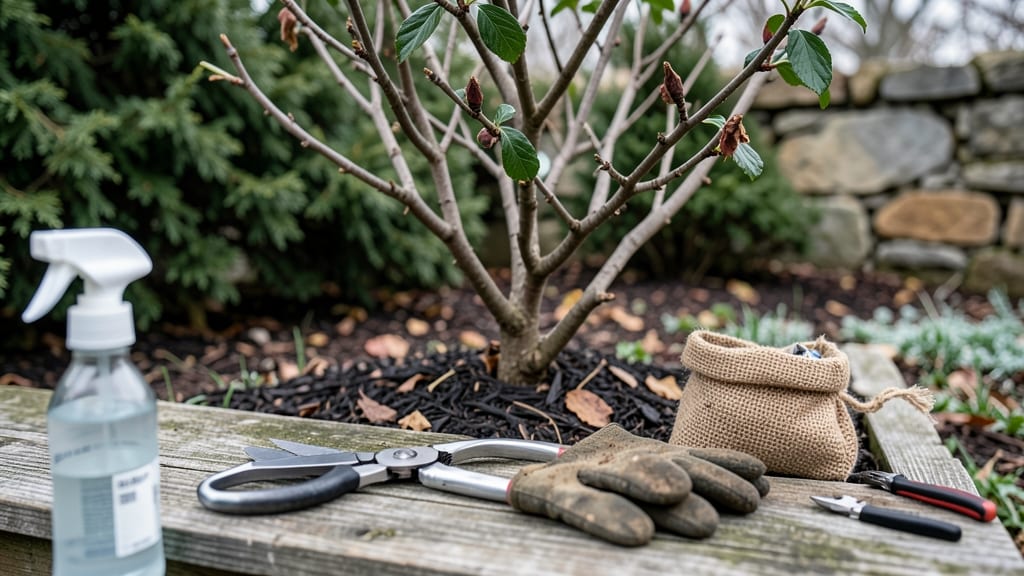
Pruning hibiscus for winter isn’t just about cleanup—it’s about setting the stage for next year’s showstopping blooms that’ll make your neighbors green with envy. 🌿 I’ve learned the hard way that skipping this step means leggy, sparse growth by summer, but doing it right transforms your hibiscus into a lush, flowering powerhouse.
The key? Timing—wait until after your first frost when the plant’s dormant, then get those shears out.
You’ll need just a few tools: sharp pruning shears, rubbing alcohol (to sterilize between cuts), and maybe some frost cloth if you’re in a colder zone. The goal is simple: remove dead, diseased, or crossing branches first, then cut back remaining stems by about one-third to encourage bushier growth.
For tropical hibiscus, you can go lighter—just trim back any frost-damaged foliage and shape as needed.
What you’ll end up with is a plant that wakes up in spring with vibrant new growth and a framework ready for next season’s flowers. The pruning scars heal quickly, and the plant focuses its energy on roots and buds instead of weak stems.
Plus, you’ll avoid the heartbreak of winter dieback—my hibiscus now survives 20-degree nights without flinching.
This works for both tropical and temperate varieties, though the approach differs slightly. In warmer climates, you might prune lightly in late winter, while colder zones need that post-frost timing.
Either way, the result is the same: a hibiscus that comes back stronger than ever. Let’s get those blooms ready for their big comeback!
📚 In This Guide
- What you need
- Instructions
- Tips and common mistakes
- Wrapping up and next steps
What you need
- ● Pruning shears: Bypass pruners (sharp, clean, and sterilized with rubbing alcohol to prevent disease). 1 pair (6–8" blades for precision).
- ● Loppers: For thicker branches (½"–1.5" diameter). 1 pair (with a bypass blade for clean cuts).
- ● Hand saw: For stubborn, woody stems. 1 small pruning saw (8–10" blade).
- ● Gloves: Heavy-duty gardening gloves (cut-resistant, waterproof). 1 pair.
- ● Disinfectant: 70% isopropyl alcohol or bleach solution (1 part bleach : 9 parts water) for sterilizing tools.
- ○ Pruning sealant: Optional but helpful for large cuts (e.g., tree wound paint to prevent sap loss).
- ● Sharpie or marker: For labeling cuts if you’re layering or training branches.
- ● Rake or broom: To clear fallen leaves/debris after pruning.
- ● Compost bin: For collecting pruned branches (hibiscus cuttings can root in water for propagation!).
- ● Pruning guide: A measuring tape (12–24") to check branch lengths.
Step-by-step guide to pruning hibiscus for winter
Here's how I prepare my hibiscus for winter—keeping them healthy and setting them up for a spectacular spring comeback.
✂️ Step 1: Time Your Pruning Perfectly
Prune your hibiscus in late fall or early winter, after the first hard frost has killed the foliage but before the ground freezes solid. This is usually November to early December in most climates. The key is to wait until the leaves have browned and dropped naturally—this signals the plant has entered dormancy and won’t regrow new growth from pruning.
If you prune too early, you risk encouraging new growth that won’t survive winter. If you wait too late, the plant may struggle to harden off properly. Look for dry, brittle stems and no green leaves remaining—that’s your cue. I like to prune on a dry, sunny day when temperatures are above 40°F to avoid stressing the plant.
✂️ Step 2: Gather the Right Tools and Approach
You’ll need clean, sharp pruning shears (sterilized with rubbing alcohol to prevent disease) and gloves to protect your hands from thorns. Hibiscus stems are woody and tough, so dull shears will crush the stems instead of making clean cuts. I also grab a small bucket to collect pruned branches for composting or mulch.
Before you start, remove any dead, diseased, or damaged branches first. These are easy to spot—they’re brown, mushy, or have black spots. Cut these back to healthy green wood or the point where the branch meets the main stem. This ensures you’re not leaving any pathogens behind that could infect the plant in spring.
✂️ Step 3: Shape and Thin the Plant
Step back and examine the overall shape of your hibiscus. Your goal is to open up the center of the plant to improve airflow and sunlight penetration, which reduces disease risk and encourages stronger new growth in spring. Start by removing any crossing or rubbing branches—these create wounds where pests and diseases can enter.
Next, cut back about one-third of the plant’s height, focusing on older, thicker stems first. Make your cuts at a 45-degree angle, about ¼ inch above a leaf node or outward-facing bud. This encourages the plant to grow outward rather than inward, which keeps the center open. Avoid cutting into the center of the plant—this creates a dense, shaded area that invites rot.
✂️ Step 4: Clean Up and Protect for Winter
Once you’ve finished pruning, collect all the debris and dispose of it in the trash—not the compost—if any branches showed signs of disease. Then, apply a 2-3 inch layer of mulch around the base of the plant, but keep it 6 inches away from the stem to prevent rot. I use straw or shredded leaves because they insulate well and break down slowly.
If you’re in a cold climate (below 10°F), wrap the plant in burlap or frost cloth after pruning to protect it from freezing winds. Secure it loosely so the plant can still breathe. Water the base lightly before winter sets in—just enough to keep the roots moist but not soggy. This helps the plant establish a good root system for spring growth.
⏰ Step 5: Monitor and Prepare for Spring
Check your hibiscus once a month during winter to ensure the mulch hasn’t shifted or compacted. If it rains heavily, fluff it up to maintain insulation. In early spring (March or April), remove the winter wrap and mulch. You’ll see new growth emerging from the base—this is a sign your pruning worked!
Here’s where it gets fun: feed the plant with a balanced fertilizer (10-10-10) in early spring to encourage vigorous new growth. You’ll likely see blooms by mid-summer if you’ve given it enough sunlight (at least 6 hours of full sun daily) and water (keep soil evenly moist but not waterlogged).
Tips & tricks for perfect winter hibiscus pruning
Getting your hibiscus ready for winter takes more than just snipping branches—these details make all the difference for a strong spring comeback.
Timing is Everything: The November to early December window is non-negotiable for most climates. I've learned this the hard way—pruning too early can trigger new growth that won't survive frost, while waiting too late risks weakening the plant before winter. Look for those telltale dry, brittle stems and completely browned leaves as your cue. The 40°F minimum temperature isn't just arbitrary—it's when the plant's natural defenses kick in to protect against cold stress. A frost-free, sunny day above this threshold gives you the perfect conditions for clean cuts that won't shock the plant.
Tool Prep Prevents Problems: Sterilizing your pruning shears with rubbing alcohol might seem like overkill, but I've seen fungal infections ruin entire plants from contaminated tools. The 45-degree angle cut isn't just aesthetic—it helps water run off the wound and reduces the risk of rot. And here's what nobody tells you: wrap your shears in a clean towel after use. The sap from hibiscus branches can gum up blades quickly, making them dull for your next cut.
Winter Protection Wisdom: That 2-3 inch layer of mulch around the base (but kept 6 inches from the stem) creates a thermal blanket that maintains consistent soil temperatures. I've found straw works better than shredded leaves in windy areas because it doesn't compact as easily. For climates below 10°F, the loose burlap wrap isn't just about insulation—it's about airflow. Too tight, and you'll trap moisture that leads to rot; too loose, and it won't protect against freezing winds. The "lightly water" instruction before winter sets in is crucial too—you're not watering for growth, but to help the roots establish a protective barrier against freeze-thaw cycles.
Spring Prep Starts Now: Mark your calendar for that monthly winter check-in—it's easy to forget until you see new growth peeking through in spring. The once-a-month reminder prevents issues like mulch compaction that can suffocate roots. And here's my secret: place a small stake near your hibiscus with the date you pruned. When you see new growth in early spring, you'll know exactly how long it took your plant to respond to your winter care.
Pro Tips for Pruning Hibiscus For Winter
- Getting your hibiscus ready for winter takes more than just snipping branches—these details make all the difference f...
- Timing is Everything: The November to early December window is non-negotiable for most climates. I've learned this th...
- Tool Prep Prevents Problems: Sterilizing your pruning shears with rubbing alcohol might seem like overkill, but I've ...
Frequently asked questions
Got questions about prepping your hibiscus for winter? You’re not alone—here are the answers to the most common concerns, from timing to troubleshooting!
When is the exact best time to prune hibiscus for winter?
Prune your hibiscus after the first hard frost (when leaves drop) but before new growth starts in early spring—typically late fall to mid-winter. This timing ensures the plant enters dormancy safely while avoiding late-season stress. Pro tip: Check your USDA zone; zones 8-10 can prune slightly later (Dec-Jan).
How much should I cut back—half, a third, or more?
For most hibiscus (tropical or hardy), aim to reduce stems by 1/3 to 1/2. Cut back to a strong outward-facing bud or joint, avoiding "top-heavy" shapes. Over-pruning risks weak regrowth; under-pruning may leave pests hiding. Troubleshoot: If your plant looks leggy post-winter, it’s okay—focus on shaping in spring!
Can I prune hibiscus in winter if it’s still green?
If your hibiscus retains leaves (common in warmer zones), wait until after a light frost or when growth slows. Green leaves signal active photosynthesis—pruning too early can shock the plant. Alternative: Trim only dead/diseased branches now, then do a full prune in late winter.
What if my hibiscus has pests or diseases before winter?
Clean up now! Remove and dispose of (don’t compost) infected leaves or stems. Prune to improve airflow, then spray with neem oil or horticultural oil to deter overwintering pests. Quick fix: Disinfect shears with rubbing alcohol between cuts to prevent spreading.
Should I fertilize after pruning hibiscus in winter?
No—hibiscus need rest! Wait until early spring (when new shoots appear) to fertilize with a balanced 10-10-10 or hibiscus-specific formula. Winter feeding can encourage tender growth that won’t survive cold snaps. Bonus: Mulch around the base (2-3 inches) to insulate roots.
Wrapping up and next steps
Pruning your hibiscus in winter isn’t just about tidying up—it’s your secret to stunning blooms next spring! By cutting back dead growth, shaping the plant, and protecting it from frost, you’re setting the stage for a vibrant comeback.
Think of it as a renewal ritual—a little effort now means big rewards when those bold flowers return.
Ready to give your hibiscus the care it deserves? Grab your pruners, check the weather, and start trimming today! Your future blooms will thank you. 🌸✂️