
Pruning
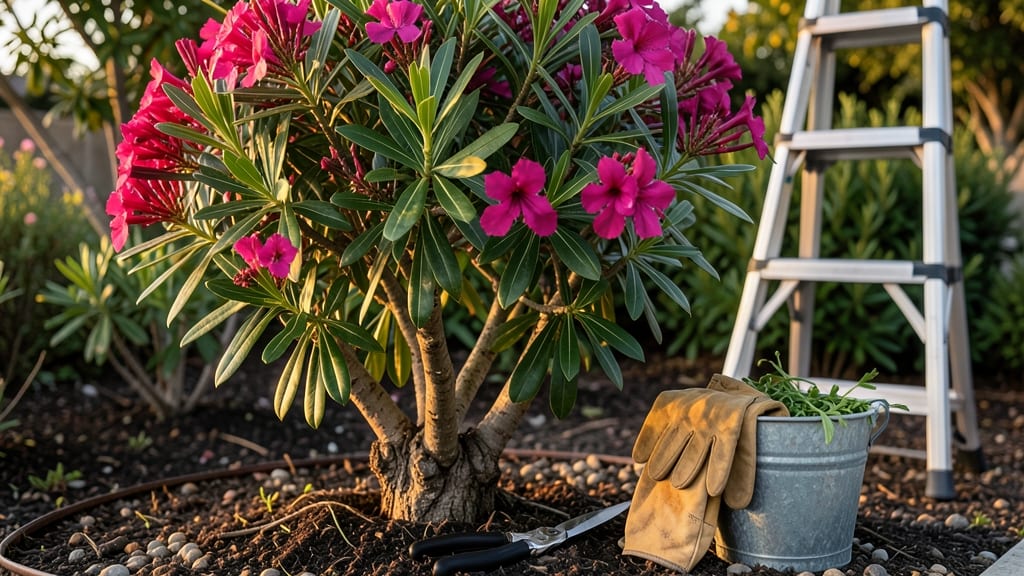
Oleander trimming and pruning transforms it from a wild, scraggly shrub into a fragrant, healthy showstopper that blooms like crazy. ✂️ I’ve learned the hard way—skipping pruning means fewer flowers, leggy branches, and a plant that looks like it’s fighting for its life. The key is timing, technique, and knowing where to cut without sacrificing next year’s blooms.
You’ll need sharp pruning shears, gloves (oleander sap can irritate skin), and a clean rag to wipe blades between cuts. Prune right after flowering, when the plant has finished blooming but before new buds form—usually in late spring or early summer.
Avoid pruning in fall or winter, as it stresses the plant and invites pests.
Start by removing dead, crossing, or crowded branches first—these steal energy from the rest of the plant. Then, cut back one-third of the oldest growth to encourage fresh, vibrant new shoots.
Always make cuts just above a leaf node at a 45-degree angle to prevent water from pooling and rotting the wound.
The payoff? A denser, bushier oleander with more blooms, stronger stems, and that signature sweet, intoxicating fragrance wafting through your yard. Just remember: never burn pruned oleander—its toxic sap releases harmful fumes. Here’s how to do it right without killing your plant.
📚 In This Guide
- What you need
- Instructions
- Tips and common mistakes
- Wrapping up and next steps
What you need
- ● Pruning shears: Bypass pruners (for clean cuts on small stems) – 1 pair (sharp, 6-8" blades).
- ● Loppers: Bypass or anvil-style (for thicker branches, 18-24" handles) – 1 pair.
- ● Pruning saw: Curved-tooth or folding saw (for stubborn, woody growth) – 1 (8-10" blade).
- ● Heavy-duty gloves: Leather or cut-resistant (oleander thorns are sharp!) – 1 pair.
- ● Long sleeves/pants: Thick fabric (to protect from sap and thorns).
- ● Disinfectant: 70% isopropyl alcohol or bleach solution (to sterilize tools between cuts and prevent disease).
- ● Trash bags: Heavy-duty (for disposing of pruned branches) – 2-3.
- ● Rake or broom: (to clean up debris afterward).
- ● Pole saw: (for high branches, 6-8 ft extendable).
- ● Safety goggles: (to shield eyes from sap and debris).
- ● Ladder: (if your oleander is tall—always prioritize safety!).
- ● Pruning sealant: (for large cuts to prevent sap oozing).
- ● Notebook/pencil: (to sketch a pruning plan if needed).
Step-by-step instructions for oleander trimming and pruning
Here's how I transform oleanders from wild, overgrown shrubs into lush, fragrant canopies that bloom reliably year after year.
✂️ Step 1: Time Your Pruning for Maximum Blooms
Prune your oleander right after flowering—typically in late spring or early summer—when spent blooms have faded but new growth hasn't yet begun. This timing ensures you don't cut off next year's flower buds hidden in the leaf axils. I always wait until at least 50% of blooms have dropped before reaching for the shears, as this gives me visual confirmation that the plant has finished its current flowering cycle.
If you prune too early, you risk removing flower buds that haven't yet formed. If you wait too late, the plant may put energy into new growth rather than storing reserves for next season. Oleanders are forgiving, but precise timing makes all the difference in bloom quantity. For tropical climates, this usually falls in June or July—just adjust for your local frost dates if you're in cooler zones.
🪴 Step 2: Gather Tools and Sanitize for Plant Safety
You'll need sharp bypass pruners for clean cuts, sterilized rubbing alcohol (70% or higher), and thick gardening gloves—oleander sap can irritate skin. I wipe my pruners with alcohol between each cut to prevent spreading disease. Never use dull tools; they crush stems and invite infections. For larger branches over ½ inch thick, switch to a pruning saw with a fine-tooth blade to avoid tearing the wood.
Remove any dead, diseased, or crossing branches first. These are your priority cuts—healthy growth can't begin until you clear the clutter. Look for branches that rub against each other or grow inward; these compete for energy and should go first. I mark these with a small flag or piece of twine so I don't miss them in the excitement of shaping.
✂️ Step 3: Make Clean Cuts at the Right Angles
Cut just above a leaf node or outward-facing bud at a 45-degree angle to encourage water runoff and prevent rot. Never leave stubs—oleanders heal poorly from improper cuts. For shaping, I remove 1/3 of the oldest growth first to rejuvenate the plant. This stimulates new shoots from the base, creating a fuller, more compact shape. Always cut back to a strong branch rather than thinning from the center.
Step back frequently to assess the shape. Oleanders respond well to structural pruning, so don't be afraid to remove entire branches if they're weak or misplaced. The goal is to create an open center that allows air circulation—this prevents fungal issues and encourages more blooms. For formal hedges, I use a handheld hedge trimmer for even cuts, but for standard shrubs, hand pruning gives better control.
🌿 Step 4: Shape for Airflow and Light Penetration
Thin out crowded areas to improve airflow, aiming for 6-8 inches between branches at maturity. Oleanders need light to reach the inner growth, so avoid heavy topping that creates dense canopies. I focus on removing branches that grow straight up or inward, as these block sunlight and create shaded, damp pockets where disease thrives. For a more natural look, I leave some uneven layers—oleanders have a beautiful, slightly wild elegance when shaped organically.
After pruning, I give the plant a light fertilizer application (10-10-10 ratio) to support new growth. Water deeply but not excessively—oleanders are drought-tolerant once established, and overwatering after pruning can stress the plant. Mulch around the base with 2-3 inches of organic mulch to retain moisture and protect roots from temperature swings.
🌱 Step 5: Monitor and Encourage New Growth
Within 3-4 weeks, you should see new shoots emerging from the pruned areas. These are your signal that the plant is recovering well. If growth is sparse or yellowing appears, adjust your watering—either too much or too little can cause stress. Oleanders are tough, but they need consistent care after pruning to establish their new shape. I make a second, lighter pruning 6 weeks later to refine the shape and remove any awkward new growth.
Here's the thing—oleanders reward patience. The first year after pruning might look sparse, but by the second season, you'll have a denser, more vibrant plant with better blooms. I always take before-and-after photos to track progress; it's amazing how much a few strategic cuts can transform a plant. And remember, if you accidentally over-prune, oleanders will bounce back—just give them time and consistent care.
Tips & tricks for perfect oleander trimming and pruning
These proven techniques will help you achieve a healthier, more vibrant oleander with minimal stress on the plant.
Timing Secret: The 50% bloom drop rule is your best friend—this visual cue ensures you don't accidentally prune off next year's flower buds. If your oleander blooms unevenly, wait until the majority of clusters have faded completely before cutting. For tropical climates, mark your calendar for mid-June to early July, but adjust 2-3 weeks earlier if you're in cooler zones where frost might threaten new growth. I've seen plants bloom twice in a season when pruned at the right time, so don't rush this step!
Tool Technique: Sterilizing your tools between cuts prevents disease spread better than any chemical treatment. I keep a small spray bottle of 70% rubbing alcohol handy and give my pruners a quick wipe after every 5-6 cuts, especially when working with multiple plants. For stubborn branches over ½ inch thick, switch to your pruning saw immediately—trying to force bypass pruners will tear the wood and create ragged edges that heal poorly. Remember, clean cuts mean faster healing and fewer entry points for pests.
Structural Pruning Strategy: When removing ⅓ of the oldest growth in Step 3, focus on branches that are at least 3 years old—they've outlived their purpose and are competing with younger growth. Look for woody stems that are thicker than a pencil; these are your priority cuts. The key is to create a balanced shape where light can penetrate to the center. I visualize the plant as an open vase—wide at the top, narrower at the base—this encourages new growth from the bottom up, creating a fuller, more compact shrub over time.
Post-Pruning Recovery: After your initial shaping, the 3-4 week recovery period is when most people make mistakes. Oleanders need consistent moisture but hate soggy roots—water deeply once a week unless you're in a drought-prone area, then increase to twice weekly. The 2-3 inches of organic mulch acts like a plant blanket, keeping roots cool in summer and insulating against winter temperature swings. I've seen pruned oleanders recover in just 2 weeks when given proper aftercare, so don't be tempted to overwater during this critical period.
Pro Tips for Oleander Trimming Pruning
- These proven techniques will help you achieve a healthier, more vibrant oleander with minimal stress on the plant.
- Timing Secret: The 50% bloom drop rule is your best friend—this visual cue ensures you don't accidentally prune off n...
- Tool Technique: Sterilizing your tools between cuts prevents disease spread better than any chemical treatment. I kee...
Frequently asked questions
Got questions about oleander trimming and pruning? You’re not alone! Here are some of the most common concerns—and their answers—to help you keep your fragrant shrubs thriving.
When is the best time to prune oleander?
The ideal time to prune oleander is late winter or early spring (before new growth begins) or after flowering (summer). Avoid heavy pruning in fall, as it can stimulate tender new growth vulnerable to frost. Light shaping can be done anytime, but major cuts should align with the plant’s natural growth cycle.
Can I prune oleander too much?
Yes! Over-pruning—especially cutting back more than one-third of the plant’s foliage at once—can stress oleander and reduce flowering. These tough shrubs tolerate light trims well, but aggressive cuts may lead to sparse growth or even dieback. When in doubt, prune gradually over 2–3 years for a fuller, healthier plant.
What should I do if my oleander bleeds sap after pruning?
Oleander sap (latex) is normal after pruning and usually harmless. To minimize mess, use sharp, clean tools and make cuts just above a leaf node. If sap irritates your skin, wear gloves. Avoid sealing cuts with paint or sealants—oleander heals best on its own. Just clean up the residue and keep an eye out for signs of stress (yellowing leaves or wilting).
How can I encourage more flowers on my oleander?
Prune strategically to boost blooms! Cut back overgrown or leggy stems to encourage bushier growth, and remove spent flowers (deadheading) to redirect energy to new blooms. Also, ensure your oleander gets full sun (6+ hours/day) and well-draining soil. Fertilize lightly in spring with a balanced, phosphorus-rich formula to support flowering.
Are there alternatives to pruning if my oleander is already overgrown?
If pruning feels overwhelming, try gradual shaping or selective thinning—remove only the most crowded or dead branches first. For severely overgrown plants, consider rejuvenation pruning: cut back all stems by half in stages over 2 years. If the shrub is beyond saving, propagation from healthy cuttings can give you a fresh start!
Wrapping up and next steps
Pruning your oleander isn’t just about keeping it tidy—it’s the secret to unlocking vibrant blooms, stronger growth, and that intoxicating fragrance you love. 🌿 With the right tools, timing, and technique, you’ll transform your plant into a thriving, fragrant centerpiece.
Now that you’re armed with expert tips, grab those shears and get pruning—your oleander (and your garden!) will thank you.
Ready to take it further? Document your progress with before-and-after photos or share your pruning wins with fellow gardeners online. Happy trimming!