
How To
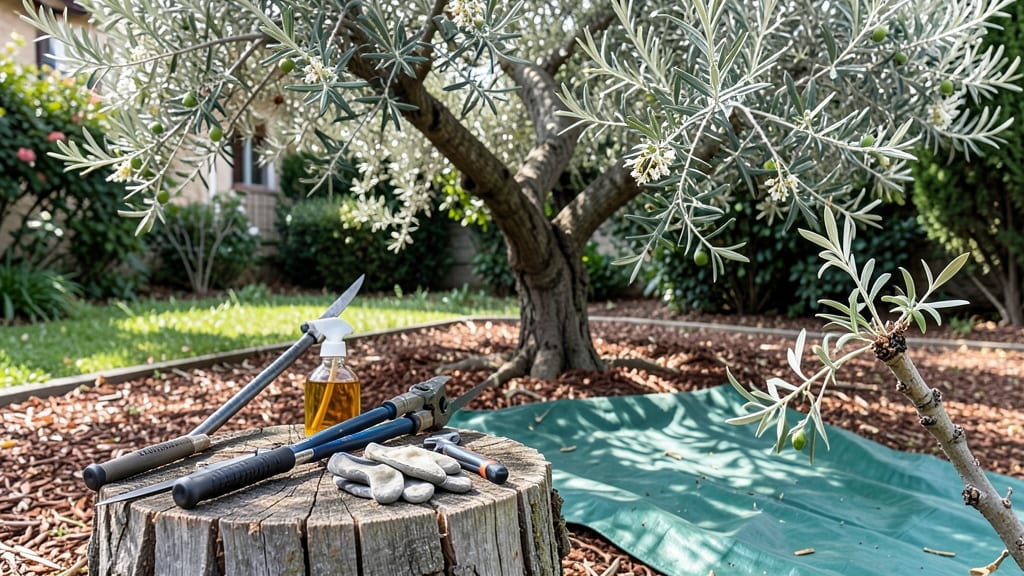
Pruning an olive tree isn’t just about shaping—it’s about unlocking its full potential. 🌿 I’ve learned the hard way that skipping pruning means fewer olives and a tangled mess of branches, but the right cuts transform a struggling tree into a productive powerhouse.
The key? Timing, technique, and knowing where to stop before you strip the tree bare.
Start with the basics: clean, sharp pruners and a clear goal—whether it’s opening up the canopy for sunlight, removing dead wood, or encouraging fruit-bearing branches. Olive trees handle pruning better than most, but they reward precision over aggression.
A little effort now means a healthier tree and a bigger harvest next season, with fewer pests and diseases creeping in.
📚 In This Guide
- What you need
- Instructions
- Tips and common mistakes
- Wrapping up and next steps
What you need
- ● Pruning shears (bypass or anvil type) – Choose bypass shears (sharp, scissor-like blades) for clean cuts on small branches (up to ½-inch thick). For thicker branches (½-inch to 1-inch), opt for pruning loppers with long handles for leverage.
- ● Pruning saw – A curved-tooth pruning saw (8-10 inches long) for branches thicker than 1-inch. Look for one with a non-slip grip for safety.
- ● Gloves – Wear cut-resistant gloves (like those rated for gardening or landscaping) to protect your hands from thorns and rough bark.
- ● Disinfectant (70% isopropyl alcohol or bleach solution) – Clean tools before and after pruning to prevent disease spread. Mix 1 part bleach to 9 parts water for a DIY solution.
- ○ Tree wound dressing (optional but helpful) – A pruning sealant (like Tanglefoot or a natural beeswax-based product) to coat larger cuts and reduce sap loss or pest entry.
- ● Ladder or stump – For trees taller than 6 feet, use a stable, extendable ladder (rated for your weight + tools). Avoid wobbly or damaged ladders!
- ● Bucket or trash bag – Collect pruned branches for disposal or composting.
- ● Sharpie or labeling marker – Mark branches you plan to prune if you’re working with a partner or need to reference notes later.
- ● Pole pruner – For high branches (over 8 feet), a pole saw or pruner with a telescoping handle saves you from climbing.
- ● Safety glasses – Protect your eyes from debris, especially when using a pruning saw.
- ● Knee pads or stool – Comfortable seating or padding if you’ll be pruning near the base for extended periods.
- ● Pruning guide or ruler – Helps ensure cuts are made at the correct angle and distance from the trunk.
- ● Camera or sketchbook – Take before/after photos or sketch the tree’s shape to track progress over the seasons.
- ● Know your tree’s age and health – Young olive trees (under 5 years) need light pruning to encourage growth, while mature trees benefit from structural shaping.
- ● Check the weather – Prune on a dry, overcast day to minimize stress on the tree and reduce sap bleeding.
- ● Avoid pruning during fruit production – If your tree is bearing olives, wait until after harvest (late fall/winter) for major pruning.
- ● Plan your cuts – Sketch a rough outline of what you want the tree to look like. Olive trees thrive with an open canopy for airflow and sunlight.
Step-by-step instructions for pruning an olive tree
Here's the method I rely on to keep olive trees thriving year-round, with seasonal timing that prevents stress.
✂️ Step 1: Assess the Tree and Plan Your Cuts
Start by examining the tree's structure in early spring before new growth begins. Look for dead, diseased, or crossing branches—these are your first targets. Olive trees naturally grow in a vase shape, so aim to maintain that open center by removing branches that grow inward or rub against each other. Use a sharp bypass pruner to make clean cuts just outside the branch collar, the swollen area where the branch meets the trunk.
I always sketch a rough plan first, marking branches to remove with a piece of chalk. This prevents over-pruning, which weakens the tree. Focus on removing no more than 25% of the canopy in any single session—olive trees are resilient but not aggressive regrowers. Look for water sprouts (fast-growing vertical shoots) and suckers (shoots from the base) to remove entirely, as they drain energy from fruit production.
✂️ Step 2: Prune for Airflow and Light Penetration
Olive trees need good airflow to prevent fungal diseases like peacock spot. Thin out 10-20% of the interior branches to let sunlight reach the center. Start at the bottom and work upward, removing smaller branches first to avoid creating large wounds. For branches over 1 inch in diameter, use loppers or a pruning saw to make clean cuts at a 45-degree angle just outside the branch collar. Avoid leaving stubs—they invite disease and rot.
Watch for shade cast by larger branches—this is where you'll see fewer leaves and smaller fruit. By opening up the canopy, you encourage even fruiting and stronger wood development. I like to step back every few minutes to visualize the tree's shape, adjusting cuts as needed. If a branch is too large to remove safely, make a three-cut technique to avoid bark tearing: undercut, then cut from above, and finally remove the branch.
⏰ Step 3: Time Pruning for Seasonal Growth
Olive trees respond best to late winter or early spring pruning (just before buds swell), but you can do light maintenance pruning after harvest in late fall. Avoid heavy pruning in summer—it stresses the tree when it's already working to produce fruit. If you must prune in summer, do so early in the morning to minimize water loss. After each cut, I apply wound dressing (like tree sealant) only to cuts larger than 1/2 inch to prevent infection.
Here's the thing—olive trees fruit on current season's growth, so pruning too aggressively reduces next year's crop. I prioritize structural cuts first, then shape the tree, and finally remove only the weakest growth. After pruning, water deeply to help the tree recover. You'll see new shoots emerging within 4-6 weeks—this is your sign that the tree is responding well. If no new growth appears by late spring, you may have pruned too late or too heavily.
✂️ Step 4: Clean Up and Monitor for Recovery
Remove all pruned branches and debris from the area to prevent disease. Sterilize your tools with rubbing alcohol between cuts to avoid spreading pathogens. I always rake up fallen leaves and small branches, then dispose of them in the trash—not the compost pile—since olive tree debris can harbor fungal spores. After cleanup, inspect the tree for sap oozing or unusual discoloration, which could indicate stress or infection.
Monitor the tree closely for the first 2-3 weeks after pruning. Healthy new growth should appear within 4-6 weeks, and you'll notice fewer leaves dropping than you might expect. Olive trees are tough, but they do best when pruned gradually over time rather than all at once. If you see yellowing leaves, it’s often due to overwatering—olive trees prefer dry conditions and will show stress if the soil stays too wet after pruning. Adjust your watering schedule accordingly.
Tips & tricks for perfect olive tree pruning
These pro insights will help you avoid common mistakes and keep your olive tree thriving for years.
Seasonal Timing Secret: The late winter/early spring window (just before buds swell) is critical for olive trees—this timing aligns with their natural dormancy period. If you must prune in summer, do it only in the early morning to reduce water loss and stress. I've seen trees recover beautifully from summer pruning when done this way, but the fruit yield may be slightly reduced that season.
Visual Cue for Perfect Cuts: When making cuts just outside the branch collar, look for the slight swelling where the branch meets the trunk—this is your target. The cut should be smooth and clean, not jagged. If you're working with branches over 1 inch thick, use the three-cut technique to prevent bark tearing: undercut first, then cut from above, and finally remove the branch completely. This method prevents the bark from splitting, which can lead to infection.
Pruning Stress Prevention: Olive trees are tough, but they do best when you don't remove more than 25% of the canopy in any single session. I've learned this the hard way—when I pruned too aggressively in one go, my tree took nearly a year to recover. Instead, spread out your pruning over multiple sessions if needed. Also, avoid pruning during drought periods—the tree needs energy to heal and regrow.
Post-Pruning Care: After finishing your cuts, water deeply to help the tree recover. You'll notice new shoots emerging within 4-6 weeks if everything went well. If no new growth appears by late spring, you may have pruned too late in the season or removed too much foliage. Olive trees prefer dry conditions, so adjust your watering schedule—yellowing leaves often signal overwatering rather than underpruning.
Pro Tips for Prune An Olive Tree
- These pro insights will help you avoid common mistakes and keep your olive tree thriving for years.
- Seasonal Timing Secret: The late winter/early spring window (just before buds swell) is critical for olive trees—this...
- Visual Cue for Perfect Cuts: When making cuts just outside the branch collar, look for the slight swelling where the ...
Frequently asked questions
Got questions about pruning your olive tree?
Here are answers to the most common queries to help you maintain a thriving, productive tree with confidence.
When is the best time to prune an olive tree?
The ideal time to prune is late winter or early spring (before new growth begins), but you can also prune lightly in summer to shape the tree. Avoid heavy pruning in fall—it can stimulate new growth that may not harden off before winter. Young trees benefit from annual pruning, while mature trees may only need it every 2–3 years.
How much can I prune an olive tree at once?
Never remove more than 25–30% of the canopy in a single session—olive trees are sensitive to over-pruning. For young trees, focus on selective shaping (removing dead or crossing branches). Mature trees can handle light structural pruning to improve airflow, but avoid aggressive cuts unless reviving a neglected tree. Pro tip: Thin out branches rather than cutting back to stubs.
What should I do if my olive tree looks unhealthy after pruning?
If leaves yellow (chlorosis), branches die back, or new growth wilts, you may have over-pruned or stressed the tree. Troubleshooting steps:
- Water deeply and mulch to retain moisture.
- Apply a balanced fertilizer (e.g., 10-10-10) in early spring.
- Check for pests (scale, spider mites) or fungal issues (like peacock spot).
- Wait until next season to prune lightly again.
Can I prune an olive tree without shears?
Yes! For small branches (up to ½ inch thick), use:
- Hand pruners (bypass or anvil types).
- A sharp bypass lopper for thicker branches.
- For very large limbs, a pruning saw (with a curved blade) works best.
Will pruning increase olive production?
Pruning doesn’t directly boost fruit yield, but it optimizes conditions for healthier growth and better harvests:
- Improves airflow and sunlight penetration, reducing disease.
- Encourages fruit-bearing wood (older branches produce more olives).
- Removes water-sapping branches to redirect energy to fruit production.
Wrapping up and next steps
Pruning your olive tree doesn’t have to be intimidating—it’s all about timing, technique, and patience. 🌿 By following this year-round guide, you’ll encourage a healthier, more productive tree with better air circulation, sunlight exposure, and fruit yield.
Start small, stay consistent, and soon you’ll see the rewards of your effort in lush foliage and abundant olives!
Ready to take the next step? Grab your pruners and schedule your first session! Whether you’re a beginner or a seasoned gardener, every trim brings your olive tree one step closer to thriving. Check out our pruning calendar to plan your seasonal tasks and keep your tree in peak shape year after year.