
Pruning
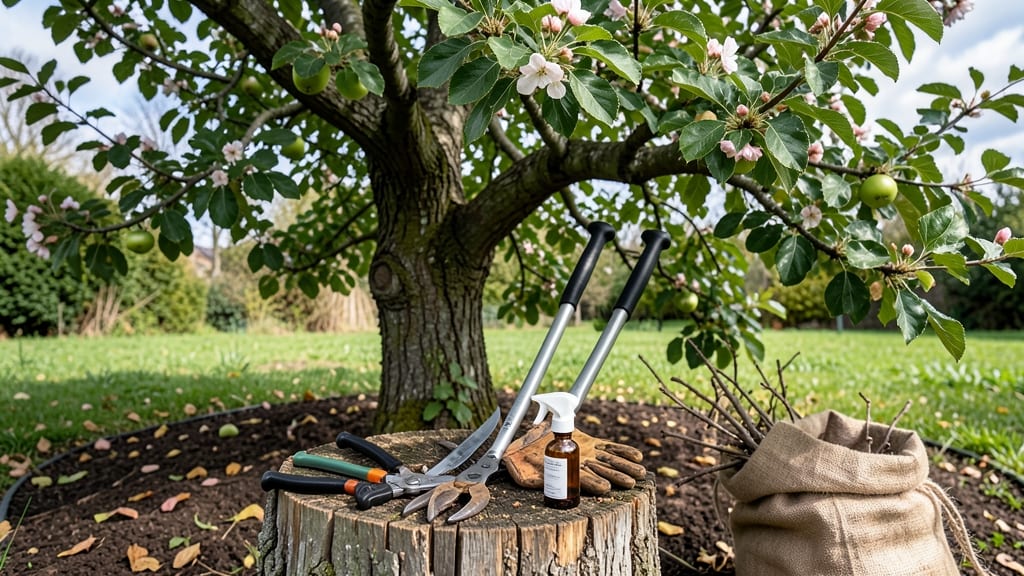
Spring pruning apple trees transforms a tangled mess into a fruit-bearing powerhouse. ✂️ I’ve watched my own trees go from chaotic branches to structured, productive canopies in just a few hours—with the right cuts at the right time.
The key? Timing it between late winter dormancy and bud swell, when the tree’s energy is focused on new growth rather than healing wounds.
You’ll need sharp pruners, a saw for thicker branches, and a clean workspace—no rusty tools or hurried cuts here. The goal is to open the center of the tree to sunlight and air, remove dead wood, and shape it for maximum fruit production.
Regional climates shift the exact timing: in warmer zones, prune earlier; in colder areas, wait until after the last frost but before buds burst.
After pruning, your tree will reward you with larger, healthier fruit and fewer disease issues. The cuts themselves might look harsh, but they’re the difference between a tree struggling to produce and one that feeds your family for years.
Think of it as giving your apple tree a fresh start—just in time for the growing season.
Pro tip: Seal larger cuts with pruning sealant only if your climate is dry or disease-prone. Most home gardeners skip this step entirely—clean cuts heal faster when left open. Now, grab your tools and let’s get those branches in shape before the buds even think about blooming.
📚 In This Guide
- What you need
- Instructions
- Tips and common mistakes
- Wrapping up and next steps
What you need
- ● Pruning shears: Bypass pruners (for cuts up to ¾-inch thick) – 1 pair (look for sharp, stainless-steel blades for clean cuts).
- ● Loppers: Bypass or anvil-style (for branches ¾-inch to 2-inches thick) – 1 pair (extendable handles are a bonus for tall trees!).
- ● Pruning saw: Curved-tooth or folding saw (for branches over 2-inches thick) – 1 saw (lightweight and portable).
- ● Gloves: Heavy-duty, cut-resistant – 1 pair (protects hands from thorns and rough bark).
- ● Disinfectant: 70% isopropyl alcohol or pruning sealant – small bottle (sterilizes tools between cuts to prevent disease spread).
- ● Rubbing alcohol or bleach solution: 1-part bleach to 9-parts water – small spray bottle (for quick tool cleaning in the field).
- ● Pruning paint or wound dressing: (for sealing large cuts—controversial but some swear by it).
- ● Ladder or step stool: (for high branches—ensure it’s stable and rated for your weight).
- ● Marking twine or flags: (to tag branches for removal—helpful for complex pruning plans).
- ● Work boots or closed-toe shoes: (for safety—apple orchards can be uneven!).
- ● Safety glasses: (to shield eyes from debris—always wear them!).
- ● Check the weather forecast—aim for a dry, calm day (avoid pruning if rain is expected within 24 hours).
- ● Gather tree records (if available)—note past pruning history or disease issues.
- ● Have a sharpener or oil handy to maintain your tools post-pruning.
- ● Wear comfortable, breathable clothing—long sleeves/pants protect from scratches and sun.
Step-by-step instructions for pruning apple trees in spring
Here’s the method I’ve used for years to keep my apple trees healthy and productive—no guesswork, just sharp cuts and clear goals.
✂️ Step 1: Remove Dead, Diseased, or Crossing Branches First
Start by scanning the tree for branches that are completely dead (no green bark, brittle wood) or diseased (mushrooms growing at the base, black spots on leaves). Use sharp pruning shears to cut these out at the branch collar—the swollen area where the branch meets the trunk. This prevents disease from spreading.
Next, look for branches that cross or rub against each other. These create wounds where pests and diseases love to hide. Cut the smaller of the two branches at its base, or the upper one if it’s larger. I always make my cuts at a 45-degree angle, about ¼ inch above a bud or outward-facing branch to encourage healthy regrowth.
✂️ Step 2: Thin the Canopy for Better Airflow and Light
Apple trees need sunlight and airflow to produce fruit and resist disease. Focus on removing branches that grow inward or downward—they block light and trap moisture. Aim to thin the canopy so you can see light filtering through to the center of the tree.
I target branches that are thinner than a pencil and growing straight up. These compete with stronger branches for nutrients. Cut them back to a healthy outward-facing bud or side branch. Never remove more than 25% of the tree’s foliage in one season—this stresses the tree and reduces fruit production.
☀️ Step 3: Shape the Tree for Balance and Fruit Production
Now’s the time to give your apple tree its signature shape. For young trees, I prune to create a central leader (one main upward-growing branch) with 3-5 scaffold branches spaced evenly around the trunk. These branches should be 6-12 inches apart and angled outward.
For mature trees, I focus on opening the center by removing branches that grow too close to the trunk or each other. This ensures sunlight reaches the core, where many fruit-bearing branches grow. Watch for water sprouts (fast-growing, vertical shoots)—these steal energy from fruit production. Cut them back to a bud or remove them entirely.
✂️ Step 4: Clean Up and Protect the Tree
After pruning, rake up all clippings and debris from under the tree to reduce disease risk. If you notice sawdust-like frass (sign of borers) or oozing sap, treat the wounds with pruning sealant or a copper-based fungicide to prevent infections.
Finally, give the tree a deep watering to help it recover. I always prune on a dry, sunny day when the tree isn’t under stress. Avoid pruning in fall or winter, as open wounds can invite pests and diseases before the tree enters dormancy.
⏰ Step 5: Monitor and Adjust Over the Season
Check your tree every 2-3 weeks during spring and summer for new growth. If you notice suckers (shoots growing from the base or roots), remove them immediately—they drain energy from the main tree. Also, keep an eye out for fruit spurs (small clusters of buds that produce fruit). These should be left alone unless they’re diseased or blocking light.
By late summer, you’ll see how your pruning choices affected the tree. If branches grew too aggressively, plan to lightly prune again in early spring to maintain balance. The goal is a tree that’s open, well-lit, and full of energy—ready to produce juicy, bountiful apples for years to come.
Tips & tricks for pruning apple trees in spring
These simple tricks will help you prune like a pro and keep your apple trees thriving for years.
The Right Tools Make All the Difference: I can’t stress enough how important it is to use sharp pruning shears—dull blades tear the bark, creating larger wounds that invite disease. I also keep a small pruning saw for thicker branches over ½ inch in diameter. Sterilize your tools with rubbing alcohol between cuts to prevent spreading any potential infections from diseased branches.
Visual Cues for Perfect Cuts: When making your 45-degree angle cuts in Step 1, imagine slicing a slice of pizza—just above a bud or outward-facing branch. The ¼-inch gap above the bud ensures new growth emerges in the right direction. For crossing branches, always remove the smaller one first to maintain the tree’s natural shape without creating awkward gaps.
Seasonal Timing is Everything: Spring pruning should happen when the tree is just starting to leaf out but before the buds fully bloom. This timing gives the tree energy to heal quickly. Avoid pruning in late summer or fall—open wounds left during dormancy become prime targets for pests and disease. I mark my calendar for late February to early March in most climates, but adjust based on your local frost dates.
Post-Pruning Care Pays Off: After you’ve finished cutting, don’t just walk away! Rake up all debris immediately to reduce disease risk, and give your tree a deep watering to help it recover. I also apply a thin layer of mulch around the base (but not touching the trunk) to retain moisture and suppress weeds. This simple step can make the difference between a stressed tree and one that thrives.
Pro Tips for Pruning Apple Trees In Spring
- These simple tricks will help you prune like a pro and keep your apple trees thriving for years.
- The Right Tools Make All the Difference: I can’t stress enough how important it is to use sharp pruning shears—dull b...
- Visual Cues for Perfect Cuts: When making your 45-degree angle cuts in Step 1, imagine slicing a slice of pizza—just ...
Frequently asked questions
Got questions about pruning apple trees in spring?
You’re not alone! Here are answers to the most common concerns—from timing to tools—to help you prune like a pro and set your tree up for a juicy, abundant harvest this season.
When is the exact best time to prune apple trees in spring?
Prune apple trees in late winter to early spring (just before buds swell but after the coldest weather). Aim for February to March in most climates. Avoid pruning too early—frost can stress fresh cuts—or too late, as new growth may sprout before you’re done. Pro tip: If you missed the window, wait until summer (after harvest) to avoid disrupting fruit development.
Can I use regular scissors or shears to prune my apple tree?
Nope!
Apple trees need sharp, clean cuts to heal properly. Use bypass pruners (for branches up to ½ inch thick) or a pruning saw for thicker limbs. Dull tools tear bark, inviting disease. Quick fix: If you’re stuck, disinfect tools with rubbing alcohol between cuts to prevent spreading bacteria or fungi.
Will pruning my apple tree reduce my fruit yield this year?
Not if done right! Pruning increases long-term yields by improving airflow and sunlight penetration. However, heavy pruning (cutting >25% of the canopy) might reduce fruit this season. Focus on removing deadwood, crossing branches, and shaping—your tree will thank you with bigger, healthier fruit next year.
What should I do if my pruned branches ooze sap or look diseased?
Sap oozing is normal for a few days post-prune, but discolored, mushy, or oozing branches signal trouble. Act fast:
- Cut back to healthy wood (look for green tissue inside the branch).
- Dispose of infected debris far from the tree.
- Apply pruning sealant (optional) to large cuts to prevent pests.
- Monitor for fire blight or canker—treat with copper fungicide if needed.
Is there a “no-prune” alternative if I’m overwhelmed?
If pruning feels daunting, focus on minimal maintenance:
- Remove only dead, diseased, or rubbing branches (no major shaping).
- Thin out 10–20% of the smallest branches to improve airflow.
- Prioritize young trees (under 5 years)—they need the most attention.
Remember: Even light pruning beats neglect. Your tree’s health (and future harvests!) will benefit from any effort over none.
Wrapping up and next steps
Pruning your apple trees in spring is a game-changer—it boosts fruit production, improves air circulation, and keeps your tree healthy for years to come! 🌳✨ With the right tools, timing, and technique, you’ll be well on your way to a bountiful harvest.
Remember, patience and precision pay off, so take your time and enjoy the process.
Ready to get started? Grab your pruners, mark those cuts, and give your apple tree the care it deserves! Your future harvest (and happy tree!) will thank you.