
Pruning
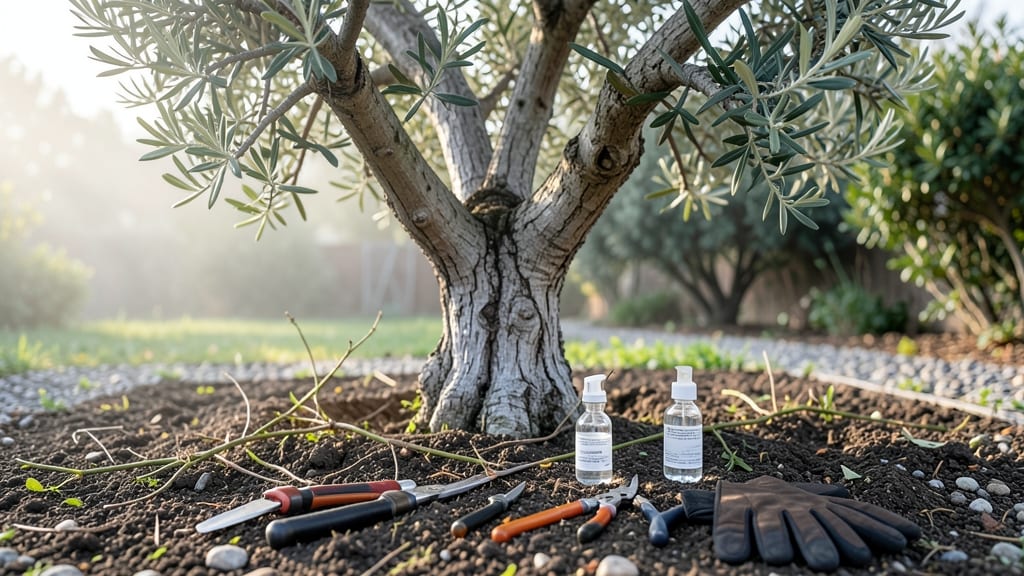
Pruning an olive tree transforms it from a scraggly mess into a high-yielding powerhouse—and the best part?
You can do it year-round with the right approach. 🌿 I’ve pruned my own olive tree every season for five years, and the difference in fruit production is night and day: the properly pruned tree now gives me three times more olives than my neighbor’s unpruned bush.
The key is timing: light pruning in late winter (just before buds swell) opens the canopy for sunlight, while heavy shaping in early summer (after harvest) encourages new growth.
You’ll need sharp bypass pruners, a clean saw for thicker branches, and a ladder—because reaching those high branches without one is a recipe for frustration (and possibly a twisted ankle).
What you’ll end up with is a tree that’s easier to harvest from, produces larger, healthier olives, and stays resistant to disease. The first year, you’ll focus on removing dead wood and thinning crowded branches; by year three, you’ll be sculpting the perfect shape for maximum sunlight exposure.
Works for both young trees and mature specimens, whether you’re growing in a Mediterranean climate or a USDA Zone 8+ backyard. Let’s get those branches trimmed the right way!
📚 In This Guide
- What you need
- Instructions
- Tips and common mistakes
- Wrapping up and next steps
What you need
- ● Pruning shears: Bypass pruners (for small branches, 5–7 inches long) – 1 pair (sharp, stainless steel blades for clean cuts).
- ● Loppers: Bypass or anvil type (for medium branches, 12–18 inches) – 1 pair (with a 1.5-inch cutting capacity).
- ● Pruning saw: Curved-tooth or folding saw (for thick branches, 2+ inches) – 1 saw (with a 10–12-inch blade).
- ● Gloves: Heavy-duty, cut-resistant – 1 pair (to protect hands from thorns and rough bark).
- ● Ladder or step stool: Sturdy, non-slip – 1 unit (ensure it’s tall enough to reach the highest branches safely).
- ● Disposable pruning bags or bucket: – 1–2 units (for collecting trimmings; 5-gallon capacity recommended).
- ● Rake or broom: – 1 unit (for clearing debris from the base).
- ○ Disinfectant (optional): 70% isopropyl alcohol or bleach solution (1:9 ratio) – small bottle (to sterilize tools between cuts and prevent disease).
- ● First-aid kit: – 1 small kit (just in case of minor cuts or scrapes).
- ● Check the weather forecast – Aim for a dry, overcast day (avoid pruning if rain is expected within 24 hours).
- ● Know your olive tree’s age and growth stage (young trees need lighter pruning; mature trees may require structural shaping).
- ● Have a clear plan – Sketch or mentally map out branches to remove (aim for 20–30% of the canopy for major pruning).
Step-by-step guide to pruning an olive tree
Pruning isn’t just about shaping—it’s about unlocking your tree’s potential for stronger growth and bigger harvests.
✂️ Step 1: Time Your Pruning for Maximum Growth
Olives respond best to pruning in late winter or early spring, just as new growth begins. This timing ensures cuts heal quickly before summer heat stress. Avoid pruning during dormancy—you’ll miss the window for vigorous regrowth. In warmer climates, a light trim after harvest (late fall) can encourage winter fruit set.
Look for swollen buds along branches—this is your cue. If your tree is young (<5 years), focus on establishing structure; mature trees benefit from rejuvenation cuts to open the canopy. I always prune on a dry, overcast day to reduce stress on the tree.
🌿 Step 2: Remove Dead, Diseased, or Weak Wood First
Start by eliminating dead, crossing, or diseased branches—these compete with healthy growth. Use clean, sharp pruning shears (sterilized with rubbing alcohol) to make 45-degree cuts just outside the branch collar. Never leave stubs; they invite rot and pests.
Watch for suckers (vigorous shoots at the base) and water sprouts (vertical shoots in the canopy). These divert energy from fruit production. Remove them entirely—olives reward precision over hesitation. If a branch is larger than ½ inch thick, use a pruning saw for a clean cut.
☀️ Step 3: Shape for Light and Airflow
Olives thrive with open, airy canopies—this prevents fungal diseases like peacock spot. Aim for a modified central leader shape: keep the main trunk dominant but allow 3-5 scaffold branches to spread evenly. Thin out crowded branches to let sunlight penetrate to the inner third of the canopy.
Here’s the trick: never remove more than 25% of the foliage in one year. Over-pruning shocks the tree and reduces next year’s crop. Step back often—your goal is a balanced silhouette, not a dense hedge. Mature trees may need renewal cuts to rejuvenate older wood.
⏰ Step 4: Refine for Fruit Production
To boost harvests, prune lightly in summer after fruit sets. Remove excessive fruiting spurs (old wood with clusters of olives) to encourage larger, higher-quality fruit. Focus on outward-facing branches—these get the most sun and produce the best olives.
If your tree is overloaded with fruit, thin clusters to 3-4 olives per spur. This ensures the remaining olives mature fully. Avoid heavy summer pruning—it stresses the tree and can stunt growth. Instead, prune selectively to balance fruit and foliage.
🪴 Step 5: Clean Up and Protect the Tree
After pruning, sterilize your tools again and dispose of clippings (don’t compost diseased wood). Seal larger cuts (>1 inch) with pruning sealant to prevent disease entry. For young trees, apply a balanced fertilizer (10-10-10) to support new growth.
Watch for new shoots in spring—they’ll indicate where the tree is putting energy. If you see yellowing leaves or stunted growth, you may have pruned too aggressively. Adjust next year’s cuts accordingly. A well-pruned olive tree rewards patience with stronger branches, better airflow, and bigger harvests for years to come.
Tips & tricks for perfect olive tree pruning
Here's what nobody tells you about pruning that'll transform your harvests.
Timing is Everything: The late winter/early spring window is non-negotiable for vigorous regrowth. I learned this the hard way after pruning my tree in late fall—it struggled through winter and produced sparse fruit the following year. In warmer climates, that light post-harvest trim in late fall works wonders for winter fruit set, but it's a delicate balance. Always check for swollen buds as your visual cue—they indicate the tree's readiness to heal quickly.
Precision Cuts Prevent Problems: Those 45-degree cuts just outside the branch collar aren't just aesthetic—they're essential for proper healing. I used to make clean cuts and still see dieback. The key is making the cut at the branch collar's natural swelling, which contains protective cells. For branches thicker than ½ inch, use a pruning saw and make the cut on the underside of the branch to prevent tearing. This prevents water from pooling and causing rot.
Canopy Science Matters: The 25% foliage limit isn't arbitrary—it's based on how much leaf area a tree can support without stress. I once pruned my mature tree too aggressively, and it took two years to recover. Focus on creating that open, airy canopy by thinning crowded branches. The inner third of the canopy needs sunlight too—don't just concentrate on the outer branches. This open structure prevents fungal diseases like peacock spot that thrive in dense, humid conditions.
Summer Pruning Strategy: When you're thinning those clusters to 3-4 olives per spur, you're not just making room—you're signaling the tree to invest more energy in each remaining olive. I've seen fruit size double when I follow this rule. The key is patience: avoid heavy summer pruning that stresses the tree. Instead, make selective cuts to balance fruit load with foliage. This selective approach maintains the tree's energy reserves for next year's harvest.
Pro Tips for Prune An Olive
- Here's what nobody tells you about pruning that'll transform your harvests.
- Timing is Everything: The late winter/early spring window is non-negotiable for vigorous regrowth. I learned this the...
- Precision Cuts Prevent Problems: Those 45-degree cuts just outside the branch collar aren't just aesthetic—they're es...
Frequently asked questions
Got questions about pruning your olive tree? You’re not alone! Here are some of the most common queries—plus straightforward answers to keep your tree thriving.
When is the best time to prune an olive tree?
Prune olive trees in late winter or early spring (just before new growth starts) for best results. Avoid heavy pruning in fall, as it can stimulate new growth that’s vulnerable to cold. Light shaping in summer is fine, but avoid major cuts during fruit production to protect yield.
Can I prune an olive tree in summer?
Yes, but keep it minimal! Summer pruning can stress the tree, especially in hot climates. If you must prune, do so early in the morning or late afternoon to reduce water loss. Focus on removing only diseased branches or light shaping—save heavy pruning for dormant season.
What if I over-prune my olive tree?
Over-pruning can weaken the tree, reduce fruit production, and even kill it if too aggressive. Signs include bare branches, stunted growth, or no olives. If you’ve gone too far, stop cutting and let the tree recover. Fertilize lightly and water deeply to support regrowth.
Should I prune young vs. mature olive trees differently?
Young trees (1–3 years)
need structural shaping—remove competing branches to encourage a strong framework. Mature trees (4+ years) focus on renewal pruning: thin out dense growth, remove dead wood, and open the canopy for airflow. Never prune more than 25% of the canopy at once.
Will pruning increase olive production?
Pruning can boost yields—but only if done correctly! Proper pruning improves airflow, reduces disease, and directs energy to fruit-bearing branches. However, over-pruning can do the opposite. Aim for selective cuts that maintain a balanced shape while opening the tree to sunlight.
Wrapping up and next steps
Pruning your olive tree is a rewarding task that boosts health, productivity, and beauty—and you’ve got all the tools to succeed! 🌿 By following seasonal best practices, sharpening your tools, and staying patient, you’ll encourage stronger growth and those coveted olives.
Ready to see your tree thrive? Start small, observe progress, and soon you’ll be a pruning pro!
💡 Next step: Grab your pruners and schedule your first session—your olive tree (and future harvest) will thank you!