
Pruning
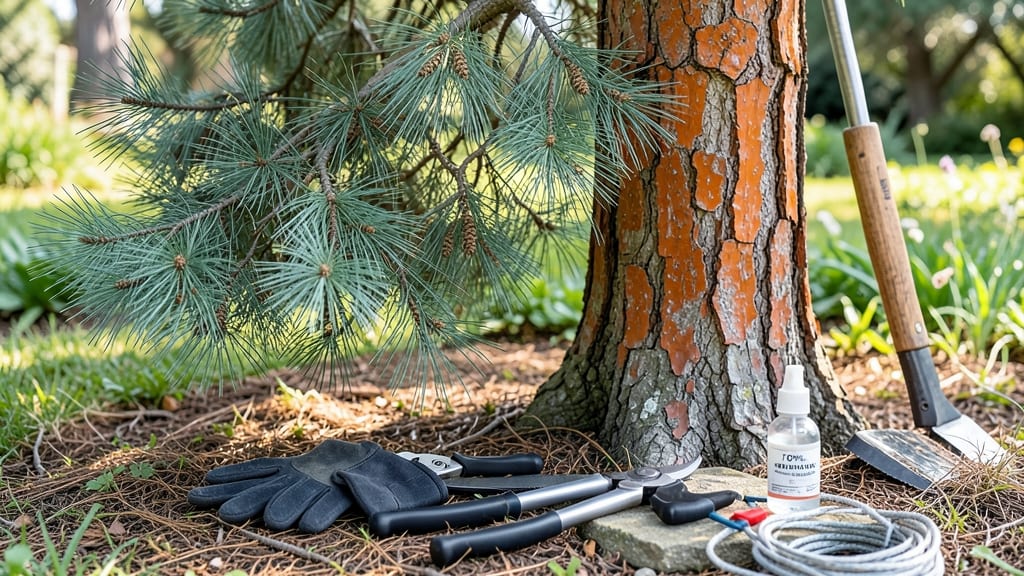
Pruning a pine tree isn’t about dramatic cuts—it’s about gentle shaping that keeps your tree thriving for decades. ✂️ I’ve learned the hard way that aggressive pruning can shock these evergreens, but the right technique encourages fuller growth and prevents disease.
The key is patience and precision, whether you’re trimming a young sapling or maintaining a mature specimen.
You’ll need sharp bypass pruners (never dull shears—they tear instead of cleanly cut), a sturdy ladder for taller trees, and a clear day when the tree isn’t stressed by heat or drought.
Most pines can handle light pruning year-round, but the best time is late winter or early spring when new growth is about to begin. Avoid heavy pruning in summer or fall, as that stresses the tree when it’s already working hard to prepare for winter.
What you’ll achieve is a tree that looks naturally balanced, with dense foliage at the top and fewer bare spots at the bottom. Proper pruning also reduces the risk of storm damage by removing weak or crossing branches.
Even a small adjustment—like trimming just a few inches from the tips—can make a noticeable difference in how your pine tree fills out over time.
This method works for all pine varieties, from dwarf varieties in containers to towering ponderosa pines in landscapes. The same principles apply whether you’re pruning for aesthetics, safety, or tree health. Let’s get started with the right approach!
📚 In This Guide
- What you need
- Instructions
- Tips and common mistakes
- Wrapping up and next steps
What you need
- ● Pruning shears: Bypass pruners (sharp, 6–8 inch blades) for small branches. Pro tip: Disinfect blades with rubbing alcohol to prevent disease spread.
- ● Loppers: 10–14 inch bypass loppers for branches ¾ inch to 2 inches thick.
- ● Pruning saw: Curved-tooth saw for branches thicker than 2 inches (avoid straight teeth—they tear wood).
- ● Safety gear: Work gloves (cut-resistant, like leather or synthetic mesh)
- ● Safety goggles (to shield from debris)
- ● Non-slip ladder or lift (if tree is tall—never stand on wobbly surfaces!)
- ● Cleaning supplies: Rag, bleach solution (1 part bleach to 9 parts water), or rubbing alcohol.
- ● Heavy-duty trash bags: 2–3 bags for debris (pines produce a lot of needles!).
- ● Pole saw: Extendable saw for high branches (saves ladder time).
- ● Tree wound dressing: Pruning sealant (controversial—skip if unsure; healthy pines heal fine without it).
- ● Marking spray: Fluorescent paint to mark branches for removal (great for large trees).
- ● First-aid kit: Just in case (scratches from pine needles can get infected!).
- ● Know your pine species: Some (like Pinus strobus) tolerate pruning better than others (e.g., Pinus sylvestris). Research or consult a local arborist if unsure.
- ● Check the weather: Prune on a calm, dry day (avoid wind or rain for 24 hours post-pruning).
- ● Timing matters: Best done in late winter/early spring (dormant season), but minor pruning can happen year-round.
Step-by-step instructions for pruning a pine tree
Here’s how I prune pine trees to keep them healthy—whether you’re tackling dead branches or shaping for safety.
✂️ Step 1: Identify and Remove Dead or Diseased Branches
Start by scanning the tree for branches that are brown, brittle, or missing needles. Pines naturally shed older needles, but dead branches will snap when bent slightly—healthy ones bend with resistance. Use clean, sharp pruning shears or loppers to cut just outside the branch collar (the swollen area where the branch meets the trunk).
Make cuts at a 45-degree angle to prevent water from pooling on the wound. If the branch is thicker than 3 inches, use a handsaw and cut in small increments to avoid tearing the bark. Work from the bottom up to avoid damaging lower branches with falling debris.
🌿 Step 2: Thin Out Crowded Growth for Better Airflow
Pines grow densely, which can trap moisture and invite fungal issues. Look for clusters of branches growing too close together—these are prime spots for disease. Select the weakest or smallest branches in each cluster and prune them back to the collar. Aim to reduce density by 20-30% total, never more than 10% in a single session.
Focus on the lower third of the tree first, as this improves light penetration and reduces ladder use. Avoid "topping" (cutting the top flat)—this stresses pines and invites rot. Instead, target branches that cross or rub against others, as these will eventually damage the tree.
☀️ Step 3: Shape the Tree for Safety and Aesthetics
Pines don’t need heavy shaping like deciduous trees, but you can gently refine their form. Remove branches growing straight upward ("candles") or outward at sharp angles, as these are prone to breaking in storms. Prune these back to a lateral branch or the collar, leaving a natural, tapered silhouette.
For younger trees, you can encourage fuller growth by trimming the leader (central stem) by 10-15% if it’s growing too fast. Wait until late spring or early summer for this—never prune in winter, as pines are vulnerable to cold damage after heavy cuts.
⏰ Step 4: Clean Up and Monitor for Recovery
After pruning, collect and dispose of all debris to prevent fungal spores from lingering. Sterilize your tools with 70% rubbing alcohol or a bleach solution (1 part bleach to 9 parts water) to avoid spreading disease. Water the base of the tree deeply if the soil feels dry, but avoid overwatering—pines prefer well-draining soil.
Watch the tree over the next 4-6 weeks for signs of stress, like yellowing needles or oozing sap. If you see excessive sap, you may have cut too aggressively. Healthy pines will fill in gaps naturally, and new growth will emerge from the sides of remaining branches.
🪴 Step 5: Schedule Regular Maintenance
Pines grow slowly, so you can prune lightly once a year in late spring or early summer. For older trees, a 3-5 year cycle of light pruning keeps them healthy without shock. Avoid pruning in fall or winter, as cold weather slows healing and increases disease risk.
If your pine is mature or very large, consider hiring an arborist for branches over 4 inches thick—these require professional tools and techniques. With consistent care, your pine will stay strong, disease-resistant, and beautiful for decades.
Tips & tricks for pruning a pine tree
Pruning a pine tree might seem intimidating, but these little-known tricks will help you avoid common mistakes and keep your tree thriving.
Tool Prep is Non-Negotiable: Always sterilize your pruning tools with 70% rubbing alcohol before and after each use. I learned this the hard way after noticing a fungal infection spread between cuts. Sharp tools also make cleaner cuts—dull blades tear bark, creating larger wounds that heal poorly. For branches over 4 inches thick, use a handsaw and make small cuts to avoid bark stripping.
Season Matters More Than You Think: Late spring or early summer is the only safe time to prune pines. During these months, the tree's natural defenses are strongest, and new growth will quickly fill in any gaps. Winter pruning stresses pines because their energy is focused on survival, not recovery. If you must prune in fall, limit cuts to removing only dead branches—never shape the tree during colder months.
The 20-30% Rule for Crowded Branches: When thinning crowded growth in Step 2, remember this simple guideline: never remove more than 10% of the tree's foliage in a single session. The 20-30% reduction mentioned in the instructions refers to overall density over time, not per cut. Pines are sensitive to sudden defoliation—think of it like giving your tree a haircut, not a shave. Start with the weakest branches first to encourage stronger growth from the remaining ones.
Visual Cues for Healthy Cuts: Look for these signs when pruning: the branch should snap cleanly at the collar when bent slightly (dead branches), and the cut should expose fresh green tissue underneath. If you see brown, stringy strands instead, that's a sign of disease—prune those branches immediately and sterilize your tools again. For shaping, aim to create a natural taper by removing branches that grow straight up or outward at sharp angles, as these are the most vulnerable to storm damage.
Pro Tips for Prune A Pine Tree
- Pruning a pine tree might seem intimidating, but these little-known tricks will help you avoid common mistakes and ke...
- Tool Prep is Non-Negotiable: Always sterilize your pruning tools with 70% rubbing alcohol before and after each use. ...
- Season Matters More Than You Think: Late spring or early summer is the only safe time to prune pines. During these mo...
Frequently asked questions
Got questions about pruning pine trees? You’re not alone! Here are answers to the most common concerns—from timing to tools—to help you prune with confidence.
When is the best time to prune a pine tree?
Prune pines only when necessary, like removing dead branches or shaping for safety. Avoid heavy pruning in late summer or early fall—this stresses the tree and invites pests. Spring (after new growth starts) or early summer is ideal for minor adjustments. Pro tip: Never prune more than 25% of the tree’s foliage at once!
Can I prune a pine tree in winter?
Winter pruning is risky for pines. Cold stress weakens the tree, making it vulnerable to disease or pests. If you must prune in winter, do so on mild days (above freezing) and focus only on removing dead or hazardous branches. Wait until spring for any major work.
What tools should I use to prune a pine tree?
Use clean, sharp pruners for small branches (under ½ inch thick) and a pruning saw for thicker limbs. For tall pines, a pole saw or harness system keeps you safe. Disinfect tools with rubbing alcohol between cuts to prevent spreading disease.
Will pruning a pine tree harm it?
Pruning can harm pines if done incorrectly. Over-pruning removes protective foliage, exposing the tree to sunburn or pests. Stick to light shaping—remove only dead, diseased, or crossing branches. Never cut into old wood (the brown, woody part) unless absolutely necessary.
How do I prune a pine tree for better shape?
Shape pines gradually by trimming just the tips of branches to encourage bushier growth. Avoid "topping" (cutting the main stem)—this creates weak, unsightly growth. For a natural look, prune outward-facing branches to open up the canopy. Work slowly and step back often to check balance!
What should I do if my pine tree looks sick after pruning?
If your pine shows yellow needles, wilting, or oozing sap after pruning, it may be stressed. Act fast:
- Water deeply (if soil is dry).
- Avoid fertilizing—it stresses the tree further.
- Monitor for pests (like spider mites or bark beetles).
- Consult a local arborist if symptoms worsen.
Wrapping up and next steps
Pruning your pine tree doesn’t have to be intimidating—just follow the right steps, and you’ll reward it with stronger branches, better shape, and long-term health! 🌲 Whether you’re trimming deadwood, shaping for aesthetics, or encouraging new growth, consistency is key.
Now that you’re armed with the when, how, and why of pine tree pruning, grab those tools and get started.
Ready to take it further? Monitor your tree’s progress after each session and adjust your approach as it grows. Happy pruning—your pine tree will thank you with lush, vibrant foliage for years to come! 🌟